QTM 350: Data Science Computing
Topic 04: Version Control
May 15, 2024
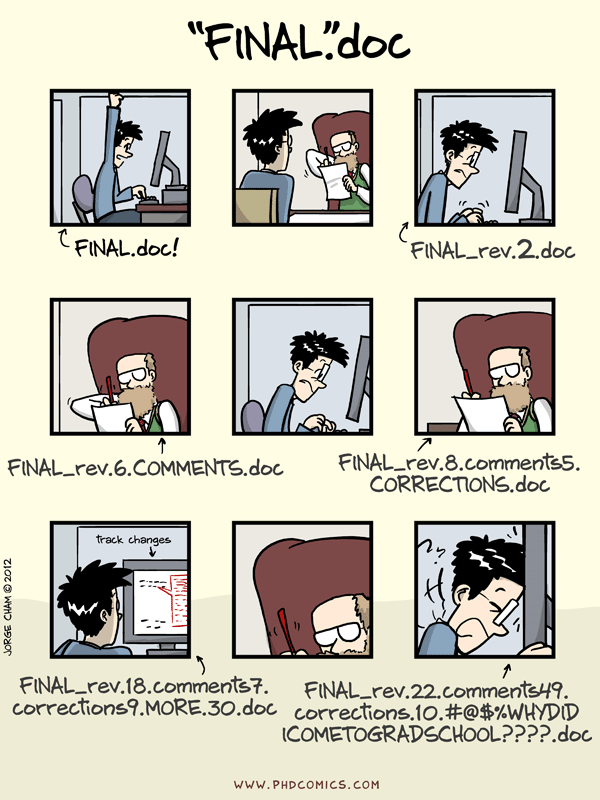
Taming chaos
In the data science workflow, there are two sorts of surprises and cognitive stress:
- Analytical (often good)
- Infrastructural (almost always bad)
Analytical surprise is when you learn something from or about the data.
Infrastructural surprise is when you discover that:
- You can’t find what you did before.
- The analysis code breaks.
- The report doesn’t compile.
- The collaborator can’t run your code.
Good project management lets you focus on the right kind of stress.
Keeping Future-you happy
- It’s often tempting to set up a project assuming that you will be the only person working on it, e.g. as homework.
- That’s almost never true.
- Coauthors and collaborators happen to the best of us.
- Even if not, there’s someone else who you always have to keep happy: Future-you.
- Future-you is really the one you organize your projects for.
- Most importantly, they are who will enjoy the fruits of your data science labor, or have to fight back your chaos.
- So, be kind to Future-you. Establish a good workflow. You’ll thank yourself later.


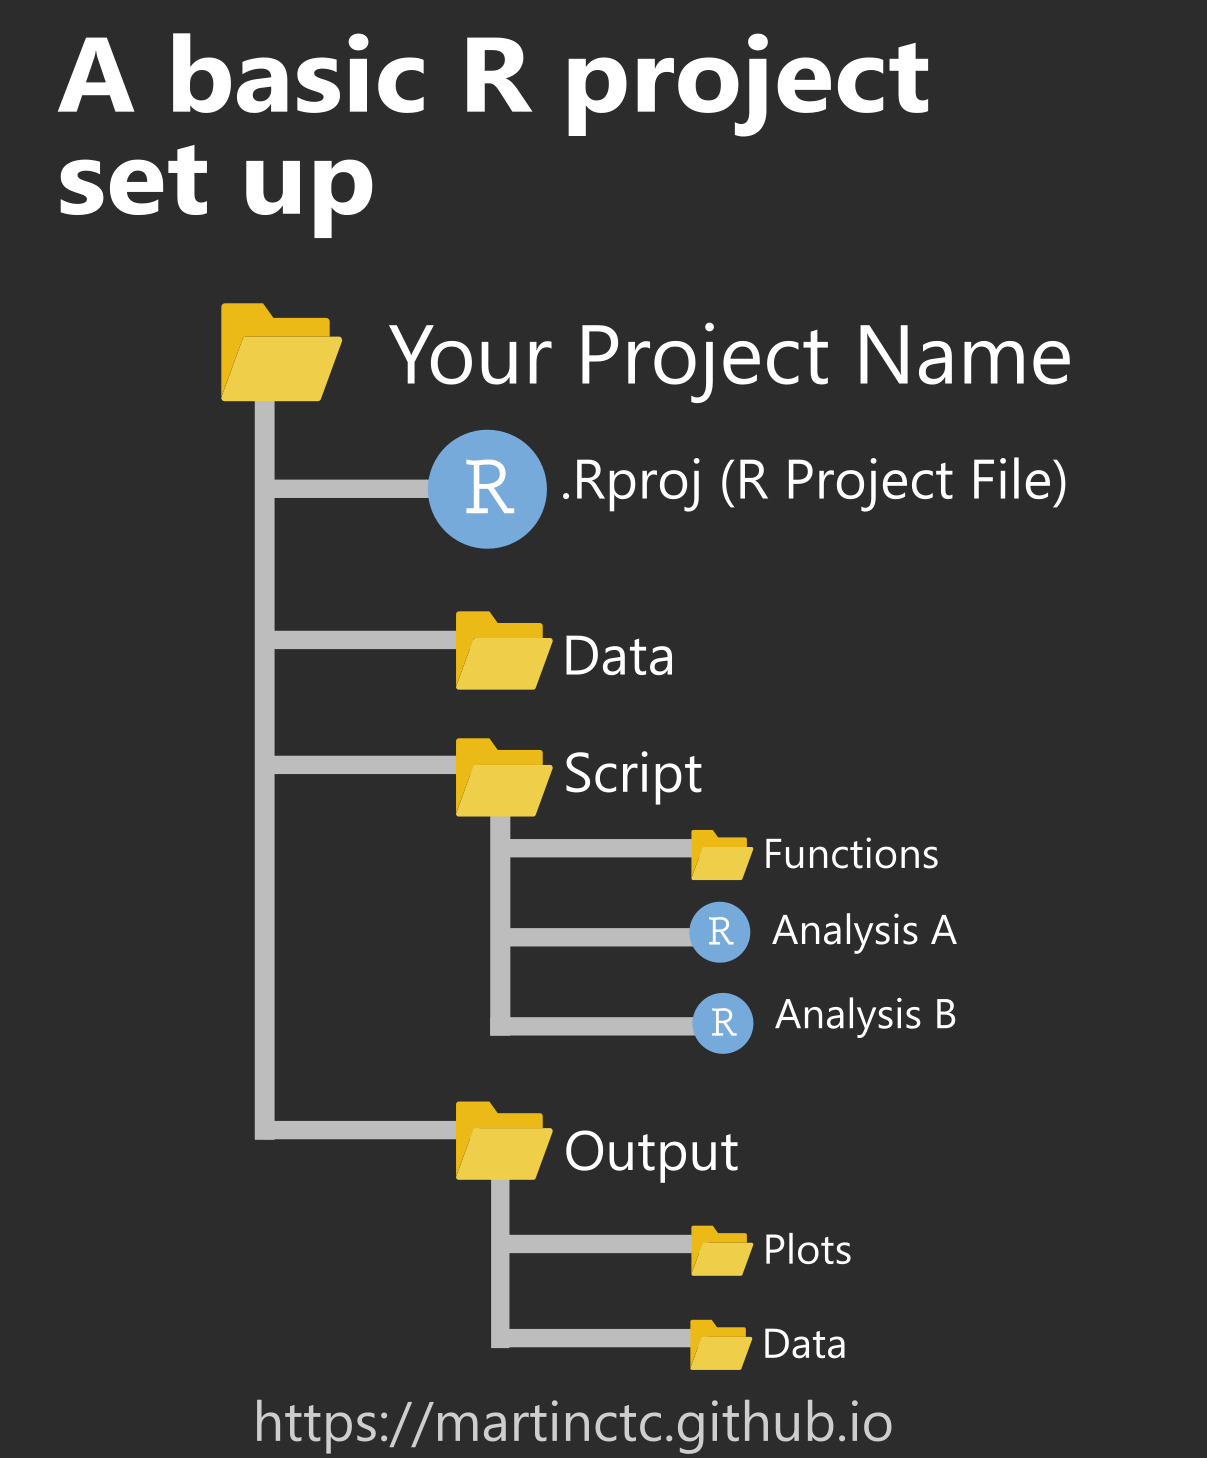
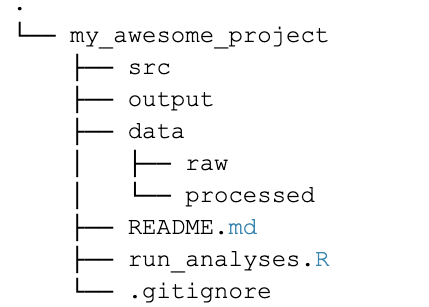
Setup: the folder structure
Structuring your working directory
- One folder contains everything inside it.
- Directories keep things separate that should be separated.
- You decide on the fundamental structure. The project decides on the details.
Further thoughts
- Ideally, your project folder can be relocated without problem.
- Keep input separate from output. Definitely separate raw from processed data!
- Structure should be capable of evolution. More data, cases, models, output formats shouldn’t be a problem.
Setup: the rest
More things to consider
There’d be more to say on how to establish a good project workflow, including how to
- store/organize raw and derived data,
- deal with output in form of graphs and tables,
- link everything together from start (project setup) to finish (knitting the report)
- separate coding for the record and experimental coding.
There’s limited value in teaching you all that upfront.
The truth is: You’ll likely refine your own workflow over time. Hopefully, I just saved you some initial pain.
Do check out other people’s experiences and opinions, e.g., here or here or here.
What is Version Control?
Version Control is a way to track your files
It is usually saved in a series of snapshots and branches, which you can move back and forth between
Version Control allows you to view how project has progressed over time
It allows you to:
- Distribute your file changes over time
- Prevent against data loss/damage by creating backup snapshots
- Manage complex project structures (e.g. Linux)
Why version control?
More reasons to do version control
Have you ever…
- Changed your code, realized it was a mistake and wanted to revert back?
- Lost code or had a backup that was too old?
- Wanted to see the difference between different versions of your code?
- Wanted to review the history of some code?
- Wanted to submit a change to someone else’s code?
- Wanted to share your code, or let other people work on your code?
- Wanted to see how much work is being done, when, and by whom?
- Wanted to experiment with but not interfering with working code?
Git(Hub) solves this problem
- Git is a distributed version control system.
- Imagine if your Dropbox (or Google Drive, or MS OneDrive for that matter) and the “Track changes” feature in MS Word had a baby.
- In fact, it’s even better than that because Git is optimized for the things that data scientists spend a lot of time working on - code!
- There is a learning curve, but it’s worth it.
- Being familiar with Git is taken for granted when you interact with other data scientists.
- It is by far not the only version control software, but certainly the most popular one.
- According to StackOverflow’s 2021 Developer Survey, more than 93% of respondents report to use Git - more than any other tool.
- It’s important to realize that Git and GitHub are distinct things.
- GitHub is an online hosting platform that allows you to host your code online.
- It relies on Git and makes some of its functionality more accessible.
- Also, it provides many more useful features to collaborate with others. (Similar platforms include Bitbucket and GitLab.)
- Just like we don’t need Rstudio to run R code, we don’t need GitHub to use Git… But it will make our lives easier.
Git: some background
Where does Git come from?
- Git was created in 2005 by Linux creator Linus Torvalds.
- The initial motivation was to have a non-proprietary version control system to manage Linux kernel development.
- Check out this (quite opinionated) talk by Linus Torvalds on Git two years after its creation.
What’s the meaning of Git?
- Anything, apparently.
- Also, it’s pronounced [ɡɪt], not [d͡ʒɪt].
How to interact with Git?
- There are many Git GUIs, giving you the option to use git without the shell (often with reduced functionality). Popular choices are the GitHub Desktop, and the Git integration into the RStudio IDE.

GitHub: some background
Where does GitHub come from?
GitHub.com launched in April 2008 by Tom Preston-Werner, Chris Wanstrath, P.J. Hyett and Scott Chacon.
In 2018, Microsoft acquired the company for more than US$7 billion.
What’s the business model?
- GitHub offers various subscription plans and has expanded its services beyond hosting Git-based version control.
Some interesting facts
GitHub’s mascot is “Octocat”, a human-cat-octopus hybrid with five arms.
There are 56m+ developers on Github, with 60m+ new repositories created in 2020 alone.
Part of GitHub’s history are controversies around issues like harassment allegations or incidences of censorship.

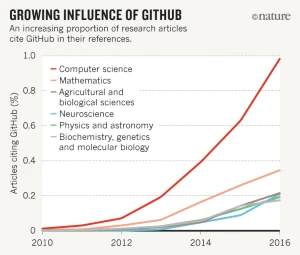
Git(Hub) for scientific research
From software development…
- Git and GitHub’s role in global software development is not in question.
- There’s a high probability that your favourite app, program or package is built using Git-based tools. (RStudio is a case in point.)
… to scientific research
First step: register a GitHub account
Good news: It’s free!
Simply go to https://github.com to sign up.
Some things to consider:
- As a student, you qualify for a free GitHub Pro account.
- The Pro account comes with a couple of additional features.
- Register for a free account first, then pursue the special offers.
- Choose your username wisely. This isn’t Instagram, so maybe avoid puns and “funny” nicknames.

Why bother with the shell?
Some benefits of the shell:
The shell is powerful and flexible. It lets you do things that the RStudio Git GUI can’t (we will see it later).
Working in the shell is potentially more appropriate for projects that aren’t primarily based in
R.Knowing the basic Git commands in the shell is a good thing for a data scientist.

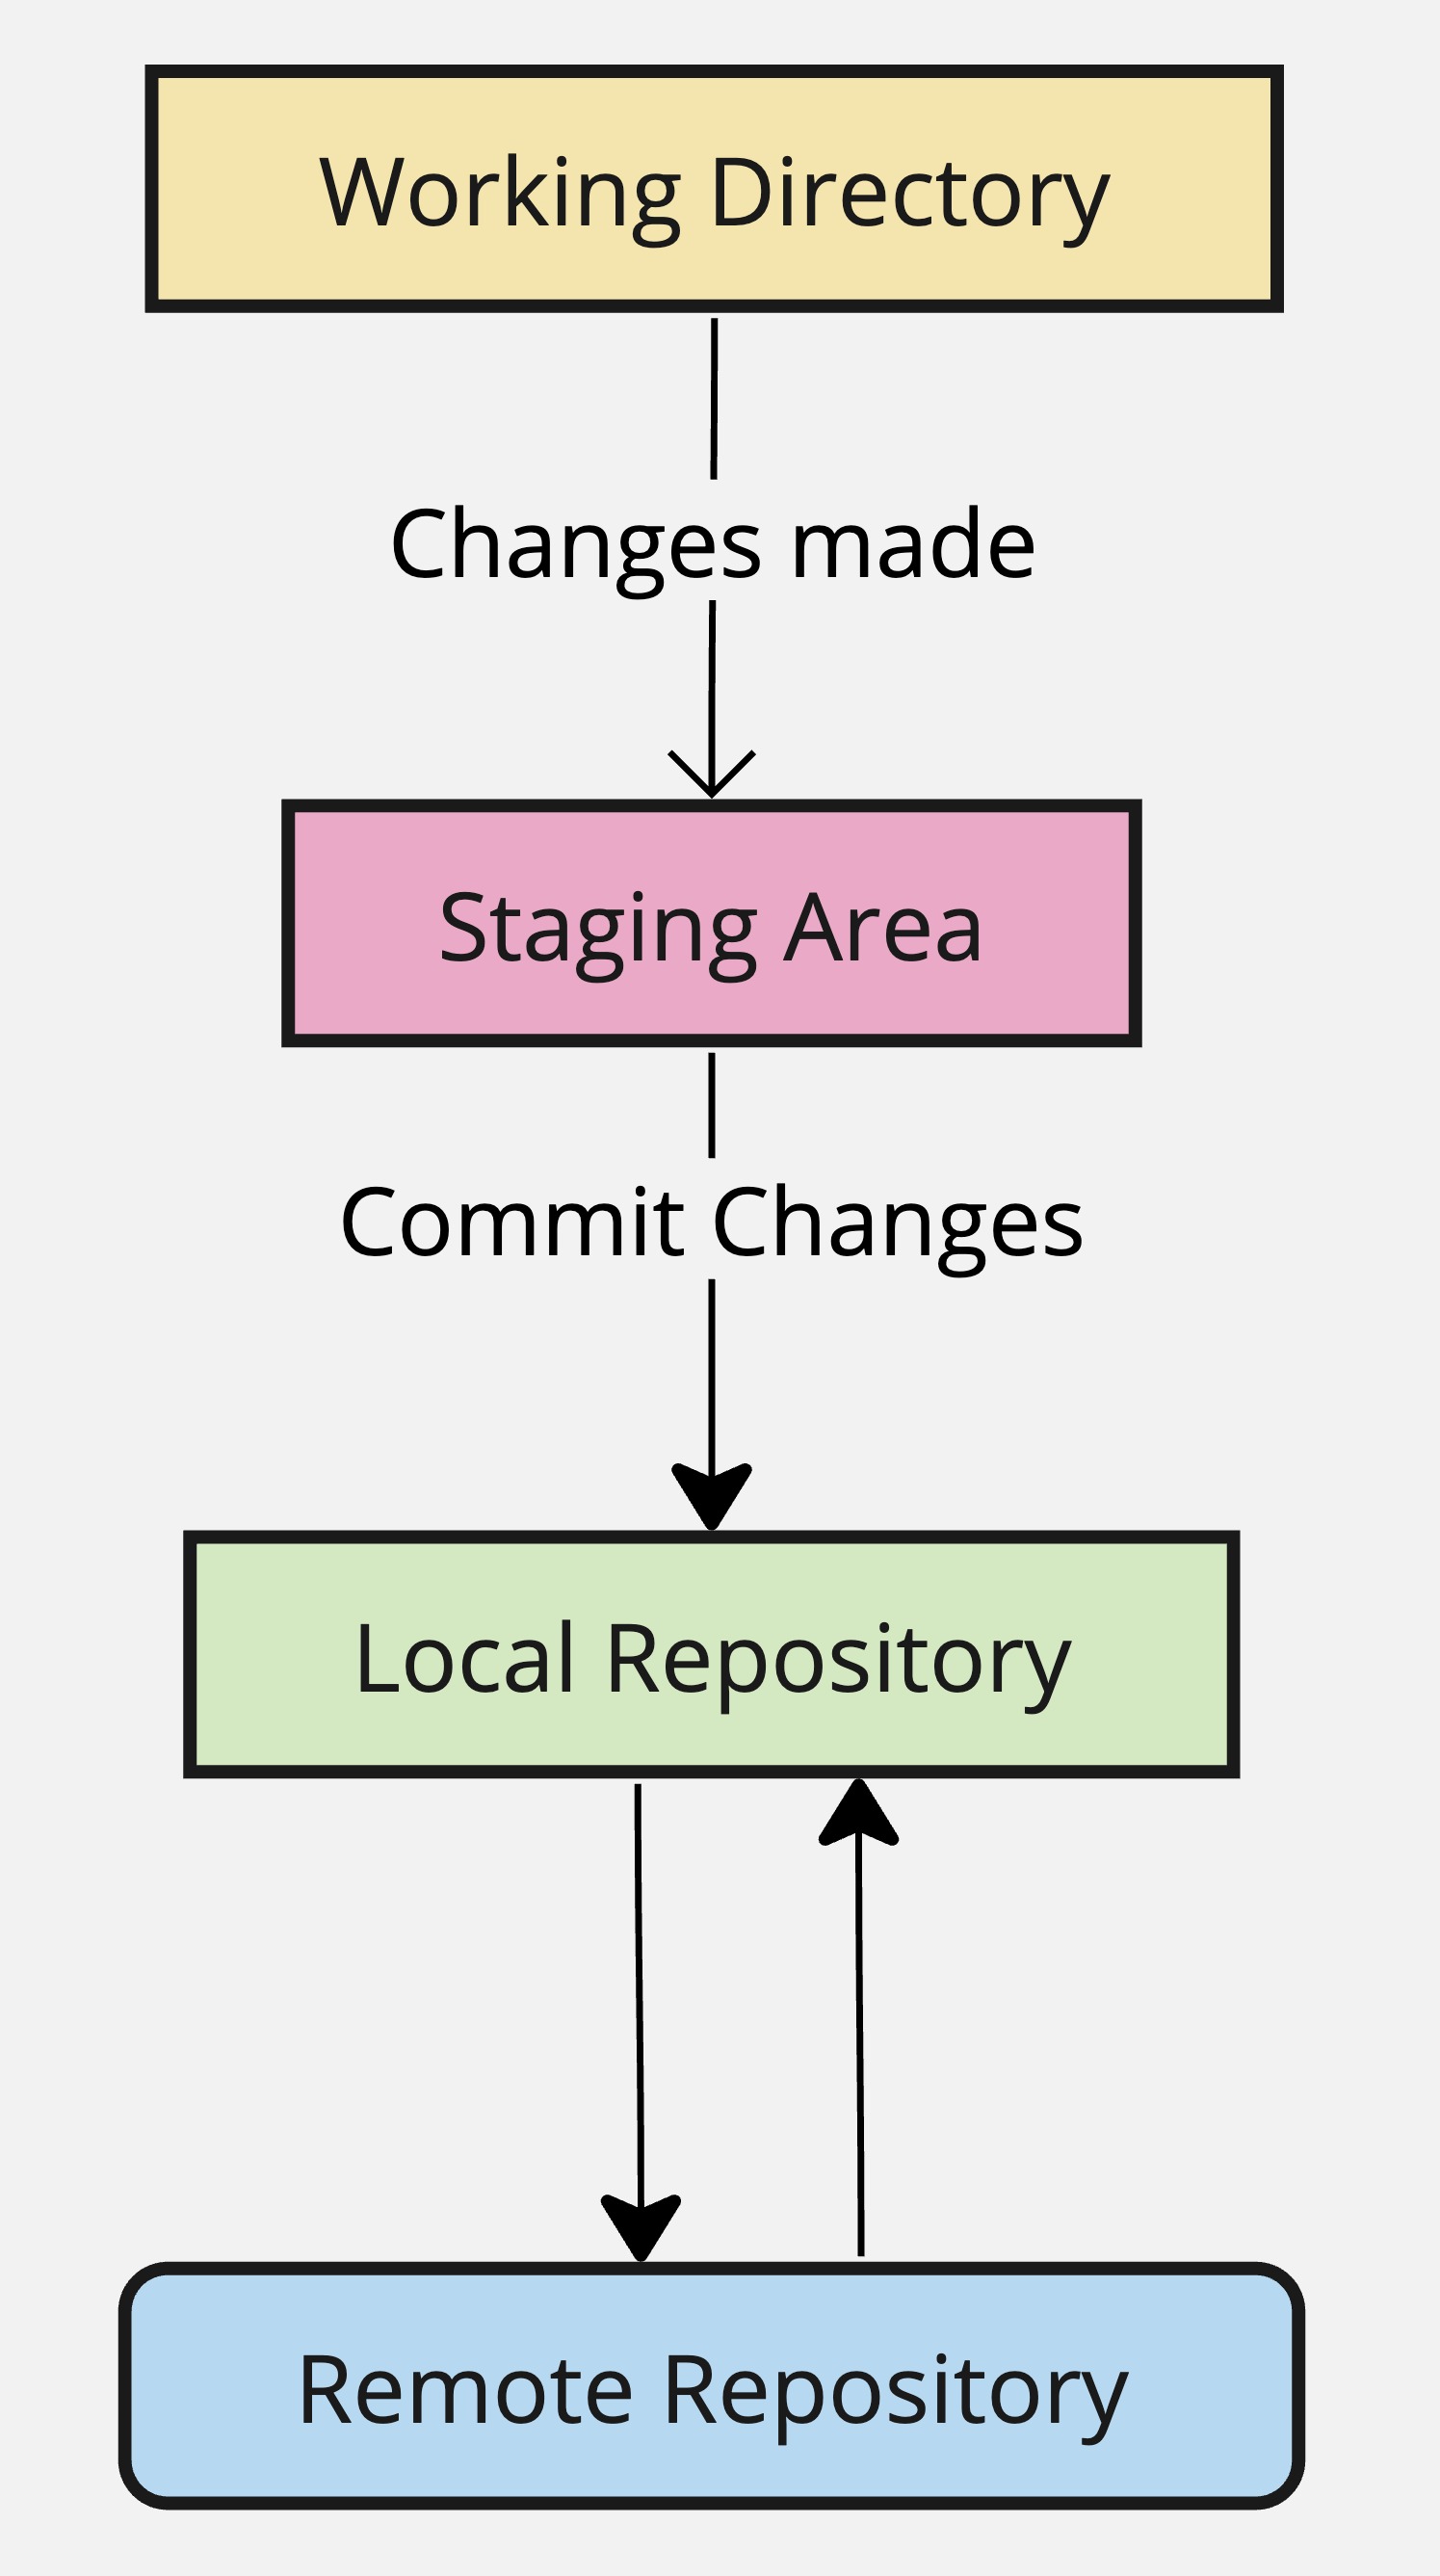
The Git Workflow
Git goes through a long chain of operations and tasks before tracking a change.
Many of these tasks are user controlled, and are required for changes to be tracked correctly.
Repositories
Repositories, usually called ‘repos’, store the full history and source control of a project.
They can either be hosted locally, or on a shared server, such as
GitHub.Most repositories are stored on
GitHub, while core contributors make copies of the repository on their machine and update the repository using thepush/pullsystem.Any repository stored somewhere other than locally is called a ‘remote repository’.
Repos vs Directories
Repositories are timelines of the entire project, including all
Directories, or ‘working directories’ are projects at their current state in time.
Any local directory interacting with a repository is technically a repository itself, however, it is better to call these directories ‘local repositories’, as they are instances of a remote repository.

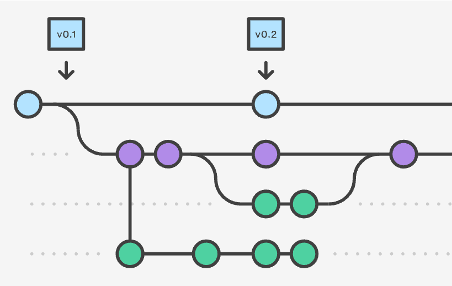
Workflow Diagram
This diagram shows a little bit about how the basic Git workflow process works
The staging area is the bundle of all the modifications to the project that are going to be committed.
A ‘commit’ is similar to taking a snapshot of the current state of the project, then storing it on a timeline.
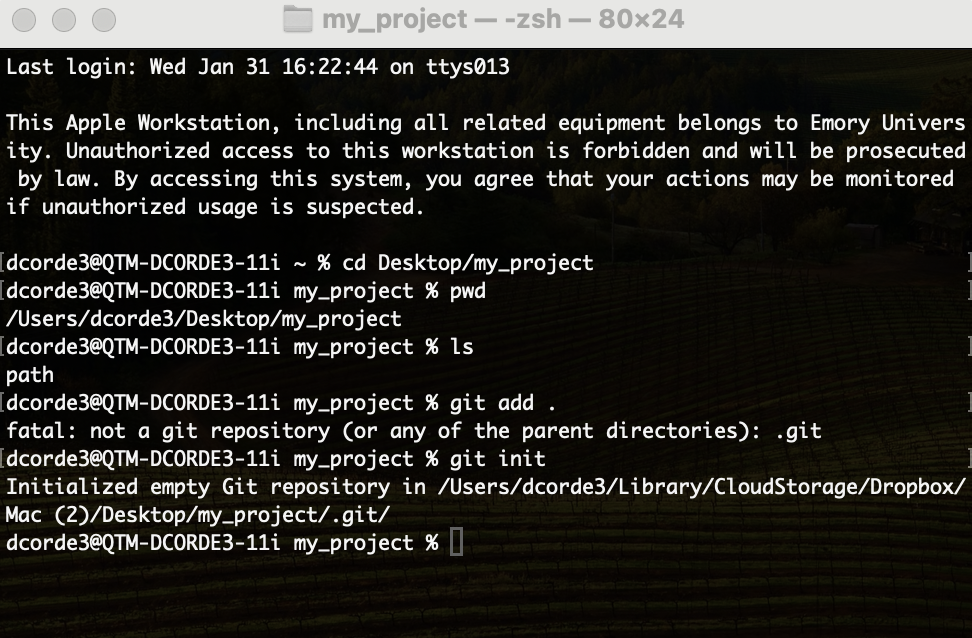
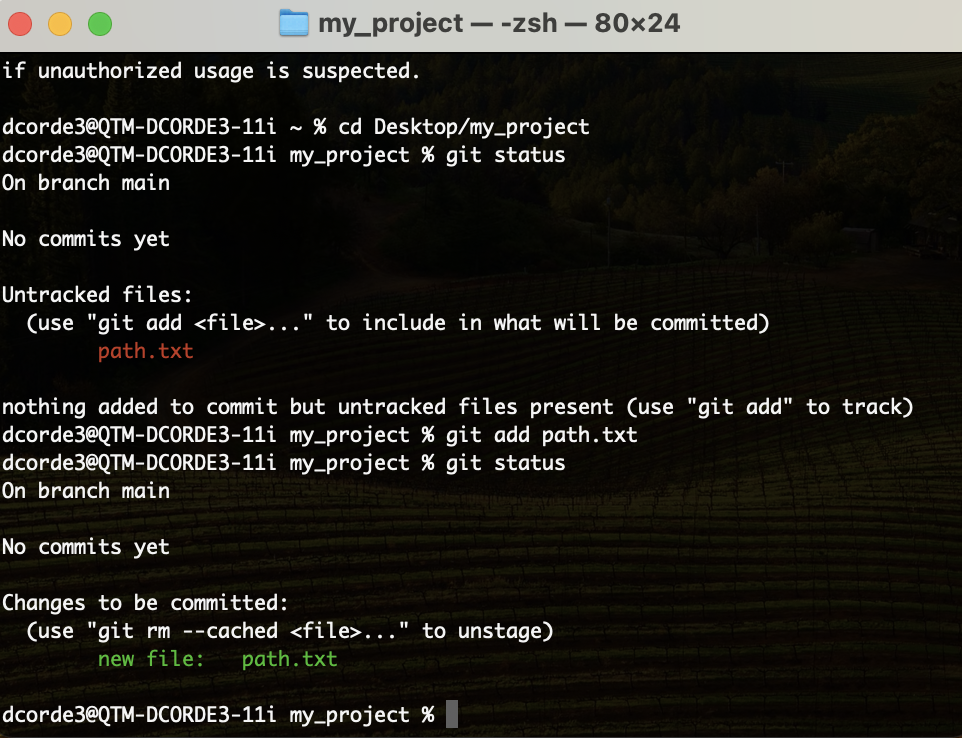
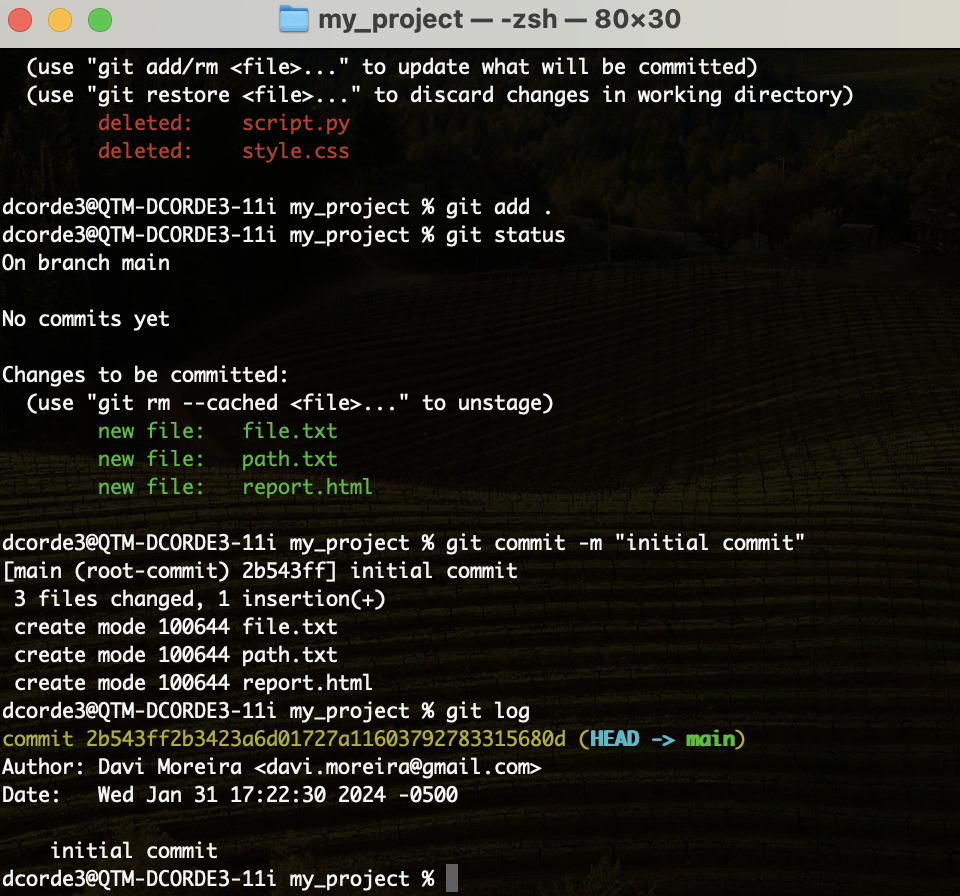
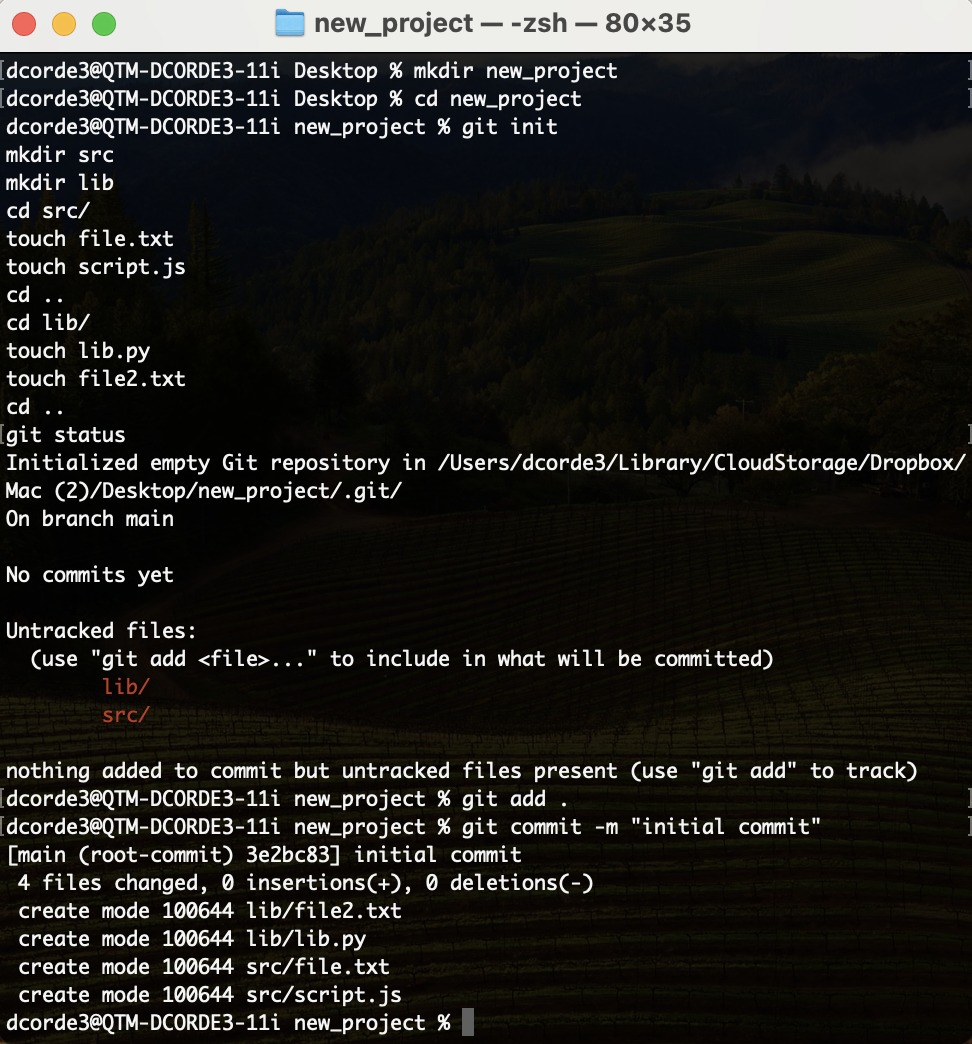
Hands on! Creating a New Repository
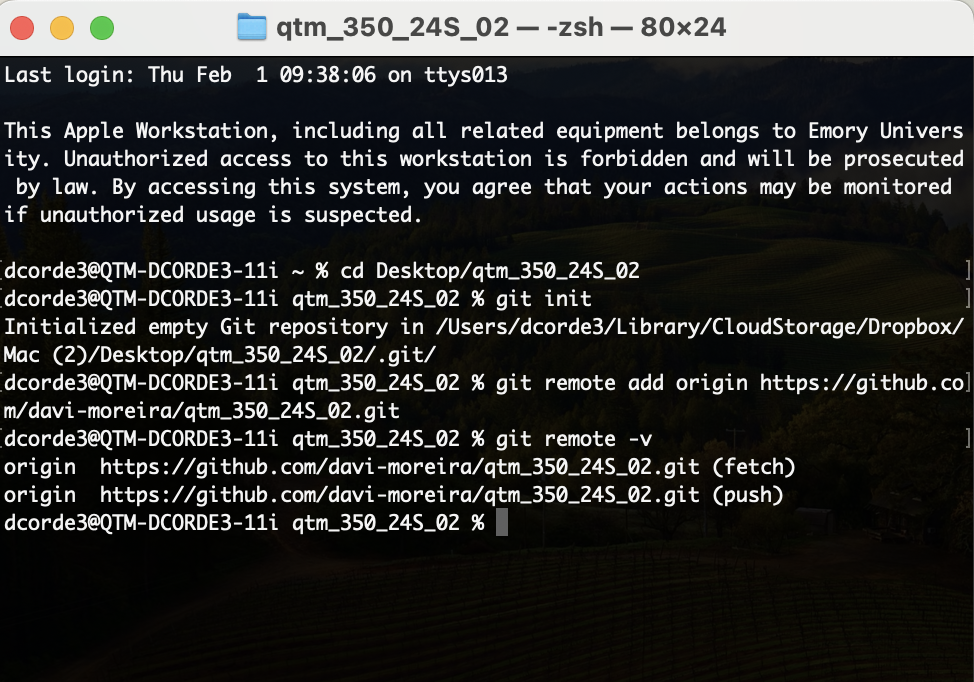
I will create a new folder/directory in my computer:
my_projectOpen the
bashTerminal and move to themy_projectdirectoryI will copy the
my_projectdirectory path into a text documentI will try to add this folder to the
staging area.
Error!
We need to initialize the repository. Do not do that in your root directory!
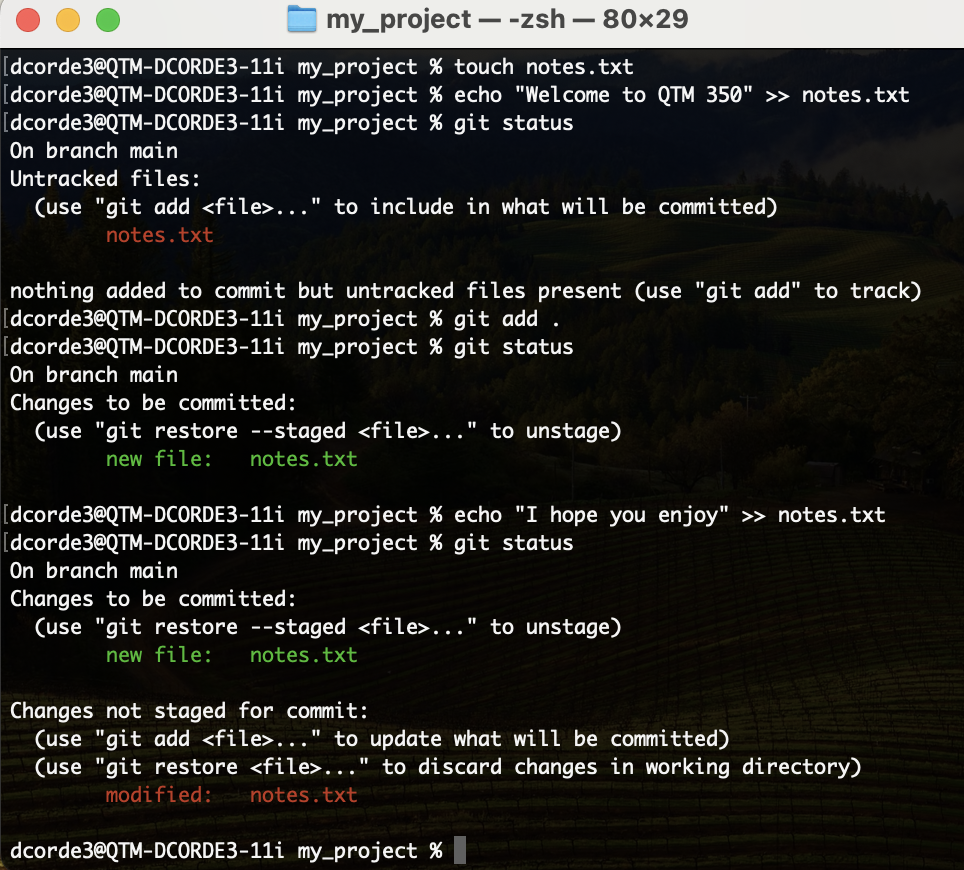
Hands on! Adding/Removing files from the repo
Hands on! Adding/Removing files from the repo
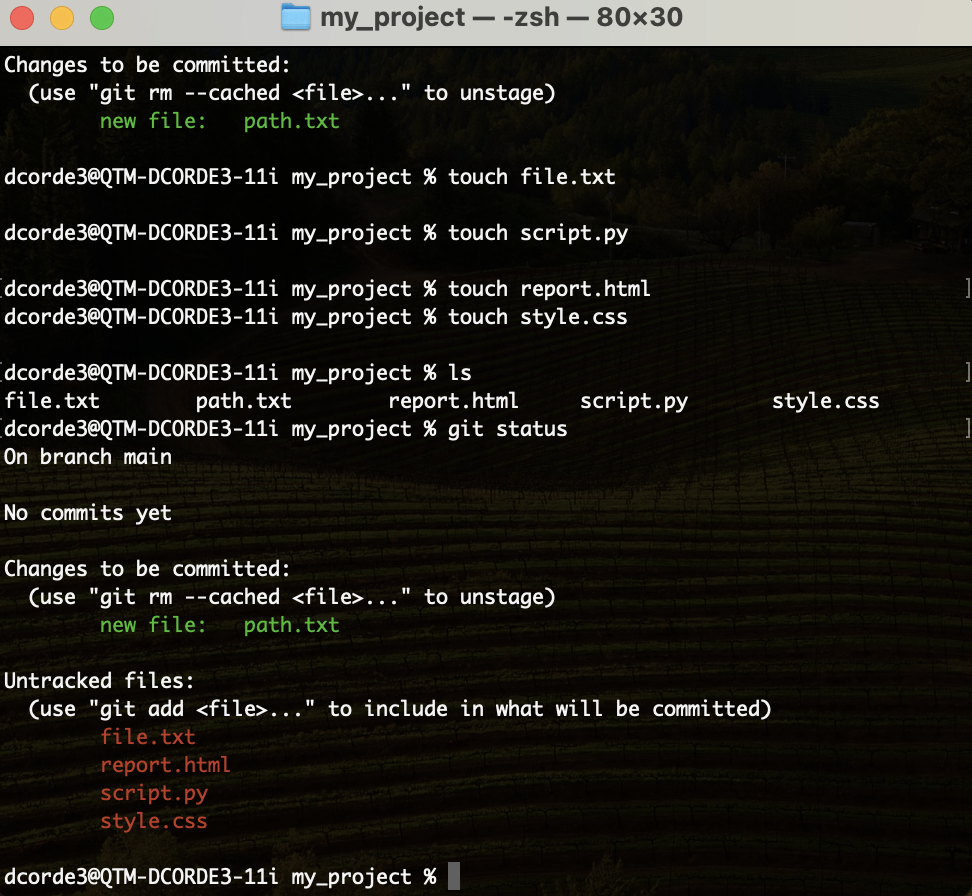
Hands on! Adding/Removing files from the repo

Hands on! Adding/Removing files from the repo
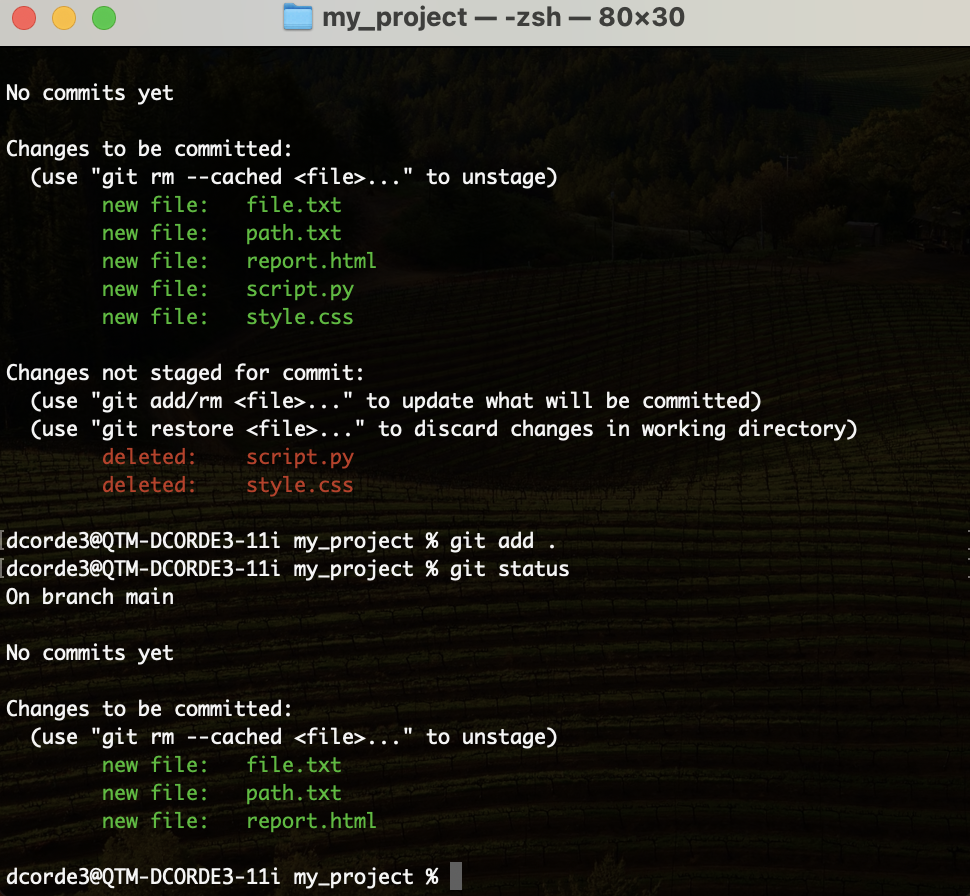
Hands on! First Commit
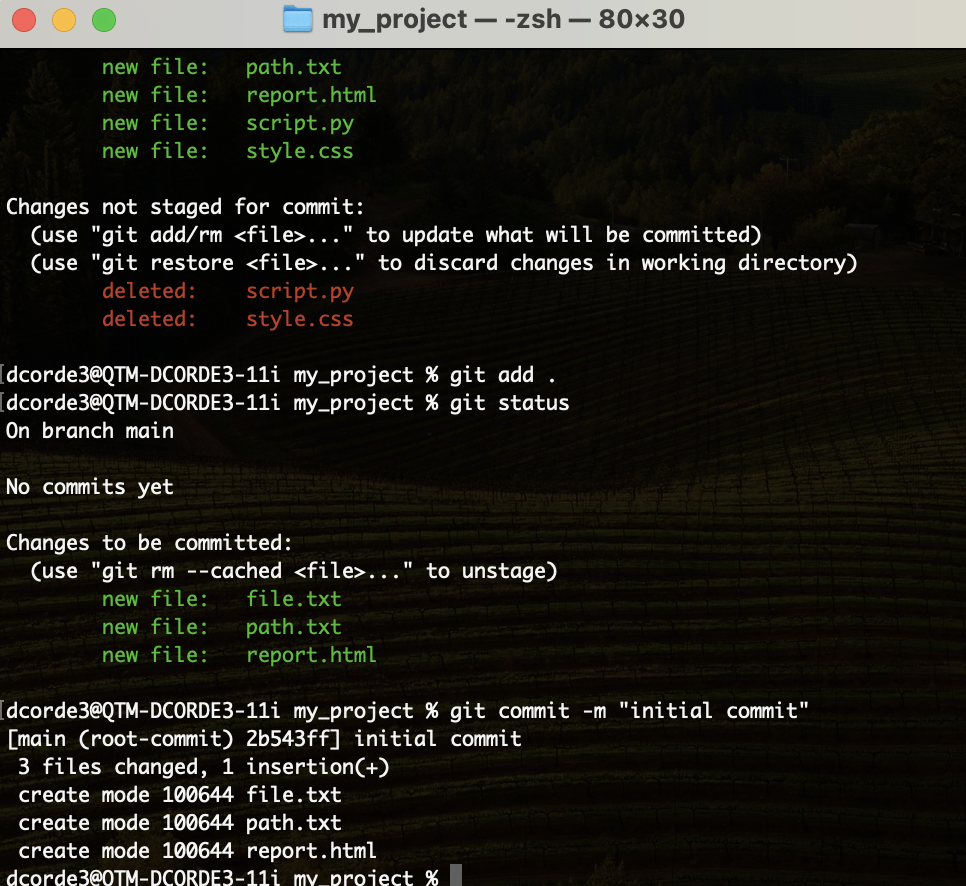
Hands on! First Commit
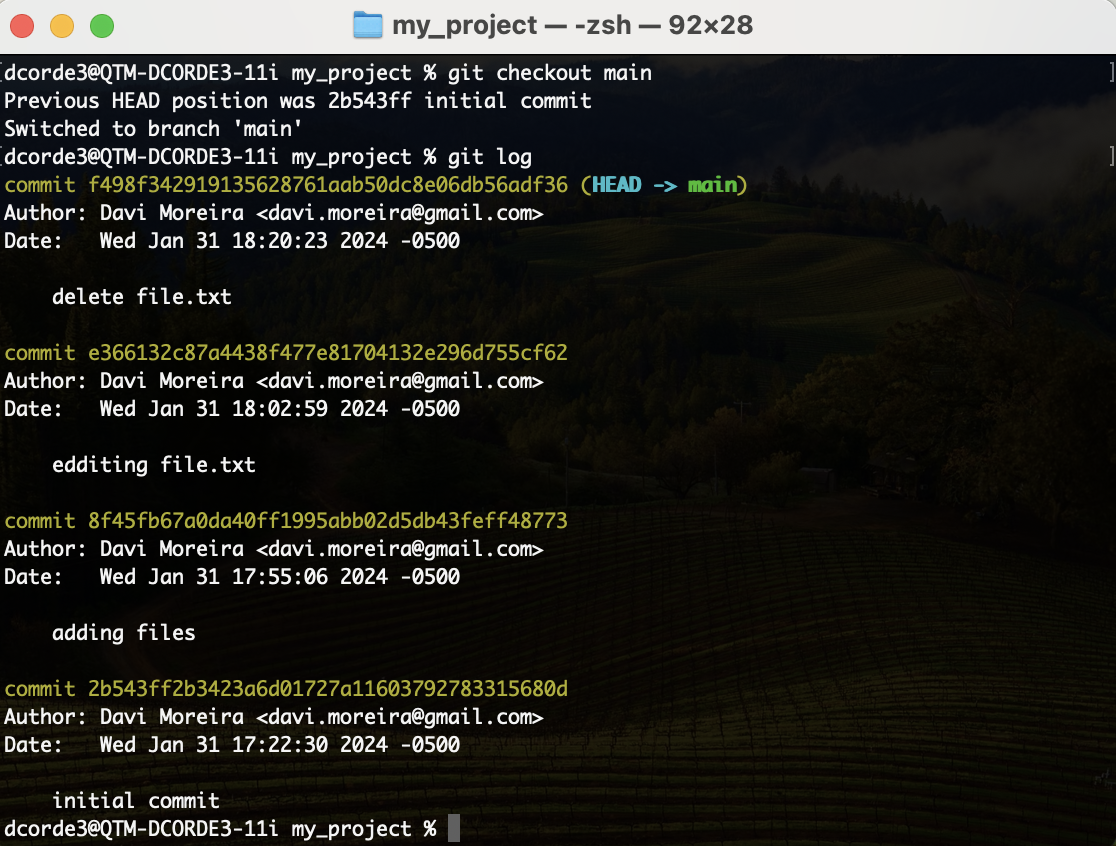
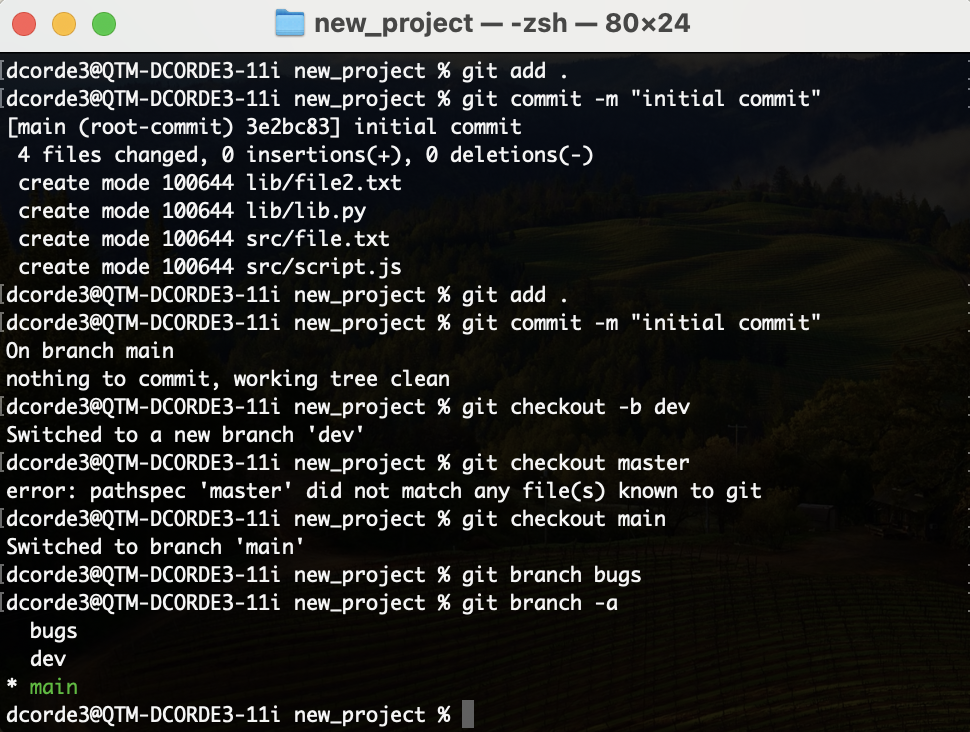
Hands on! Git Checkout
- First, let’s make new commits in our
repo:
touch script.py  # new file
touch webpage.html. # new file
touch style.css  # new file
git add . # add files to the staging area
git commit -m "adding files" # new commit
echo "Hello you" >> file.txt   # edit .txt file
git add . # add files to the staging area
git commit -m "edditing file.txt". # new commit
rm -f file.txt. # remove file
git commit -a -m "delete file.txt" # new commit
git log  # lets check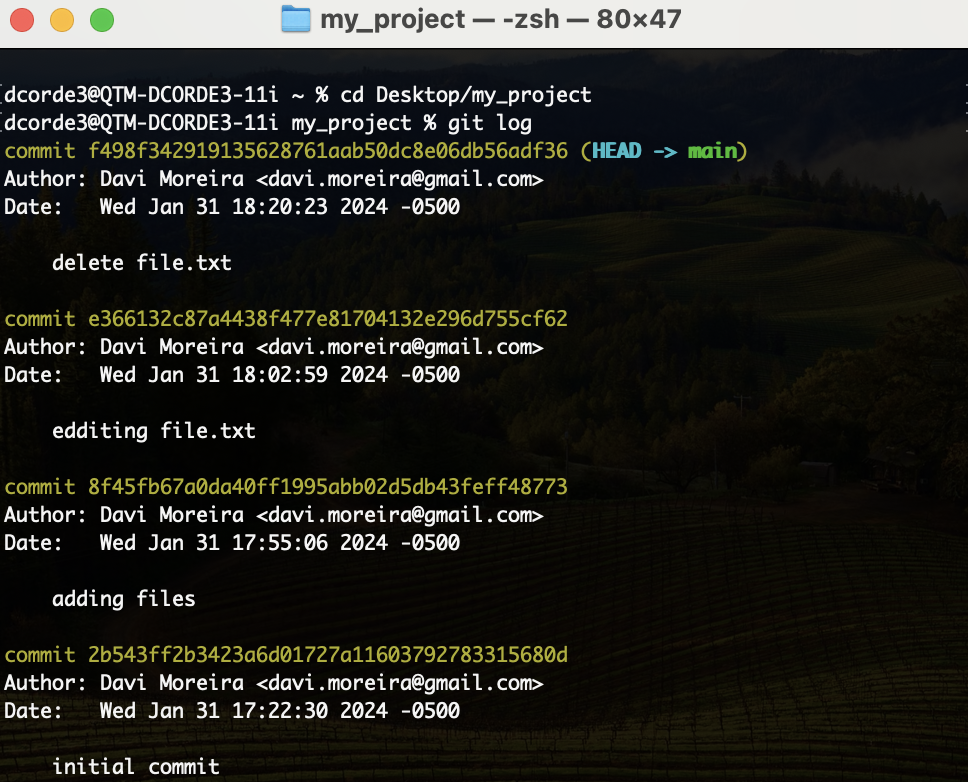
Hands on! Git Checkout
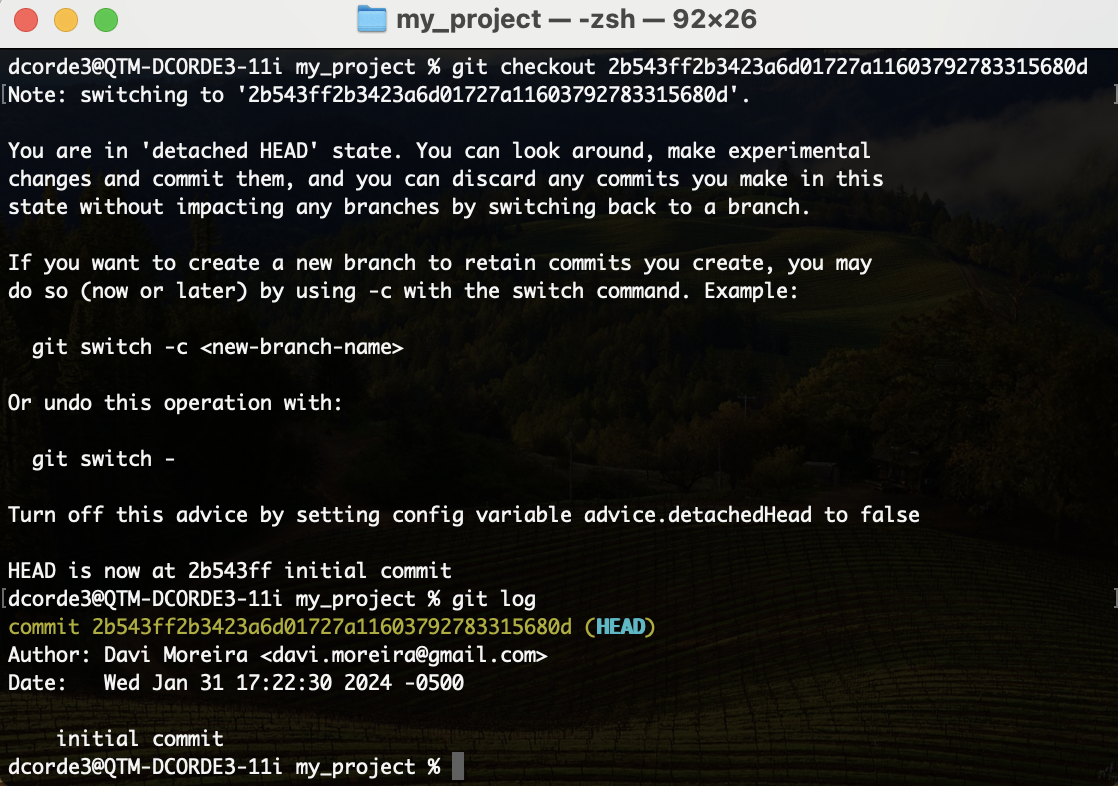
Hands on! Git Checkout
Hands on! .gitignore
Hands on! .gitignore
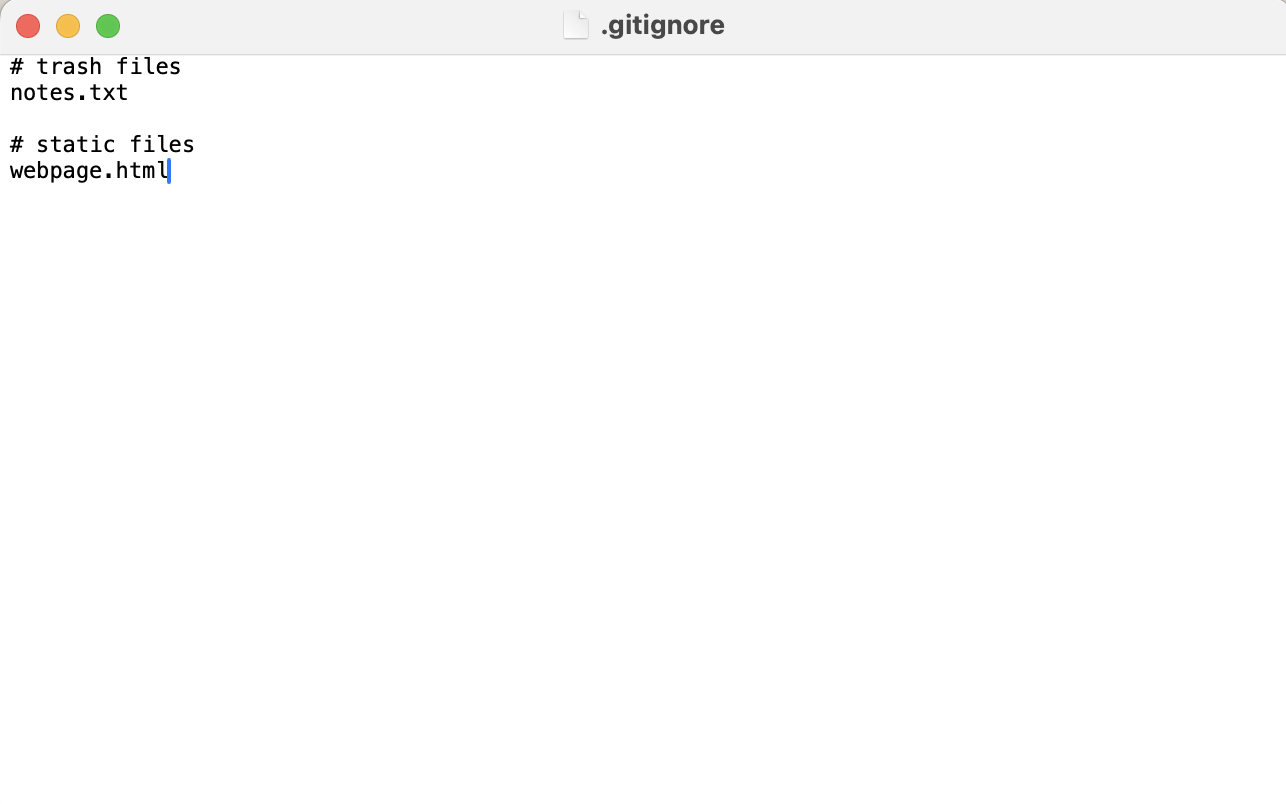
Hands on! .gitignore
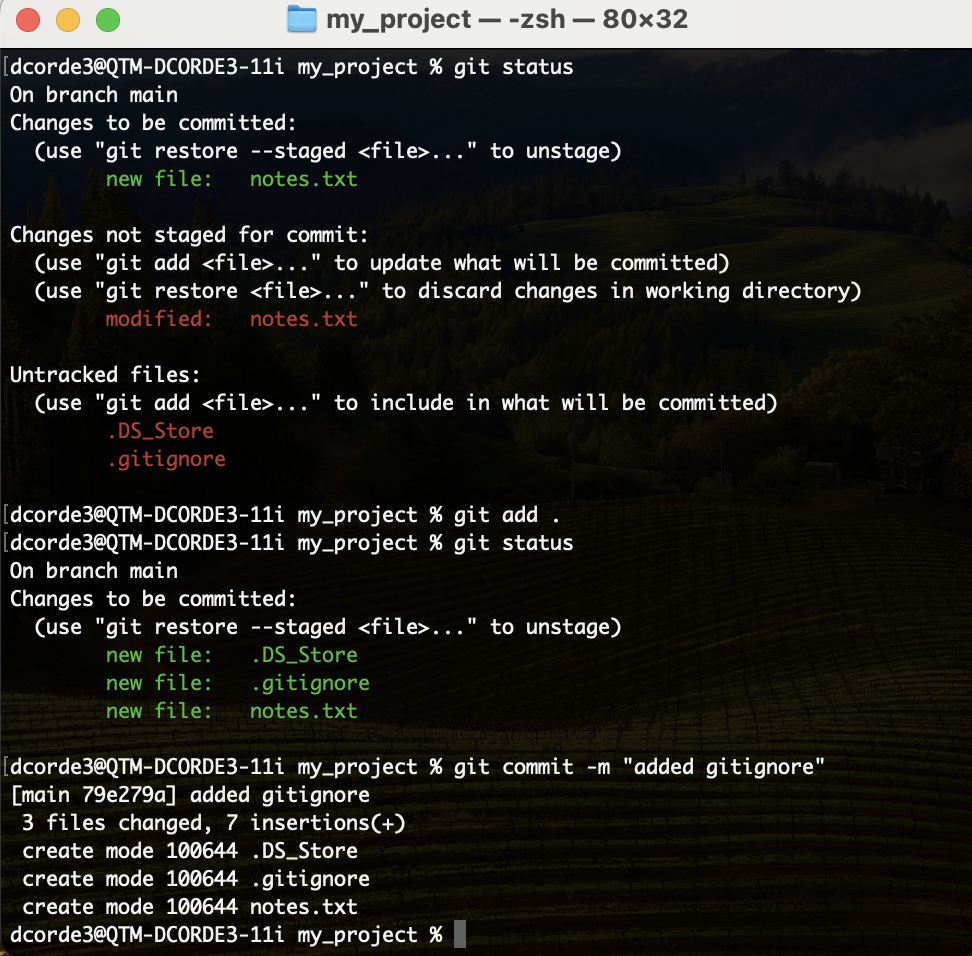
Hands on! .gitignore
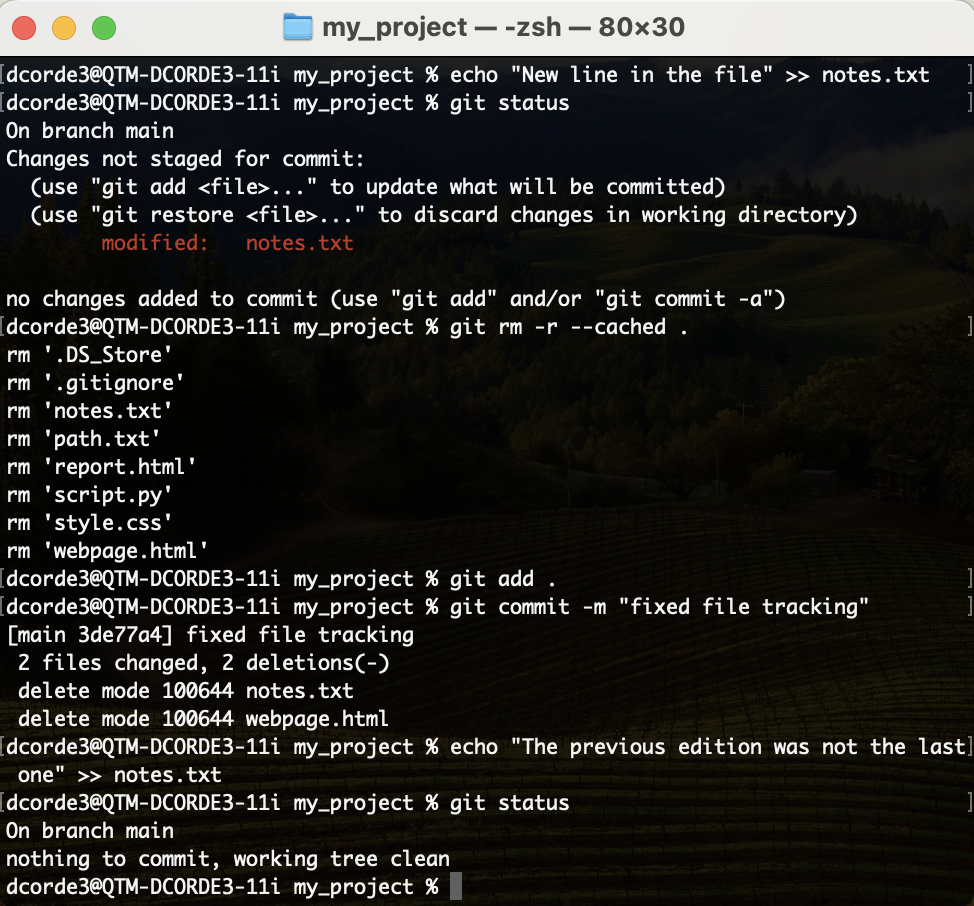
- Now, let’s edit the
notes.txtfile. - Check
git status - We need to update the cached files list, commit these updates and…
- Let’s edit the
notes.txtfile one more time. - Finally, let’s check if the
notes.txtfile is being tracked.
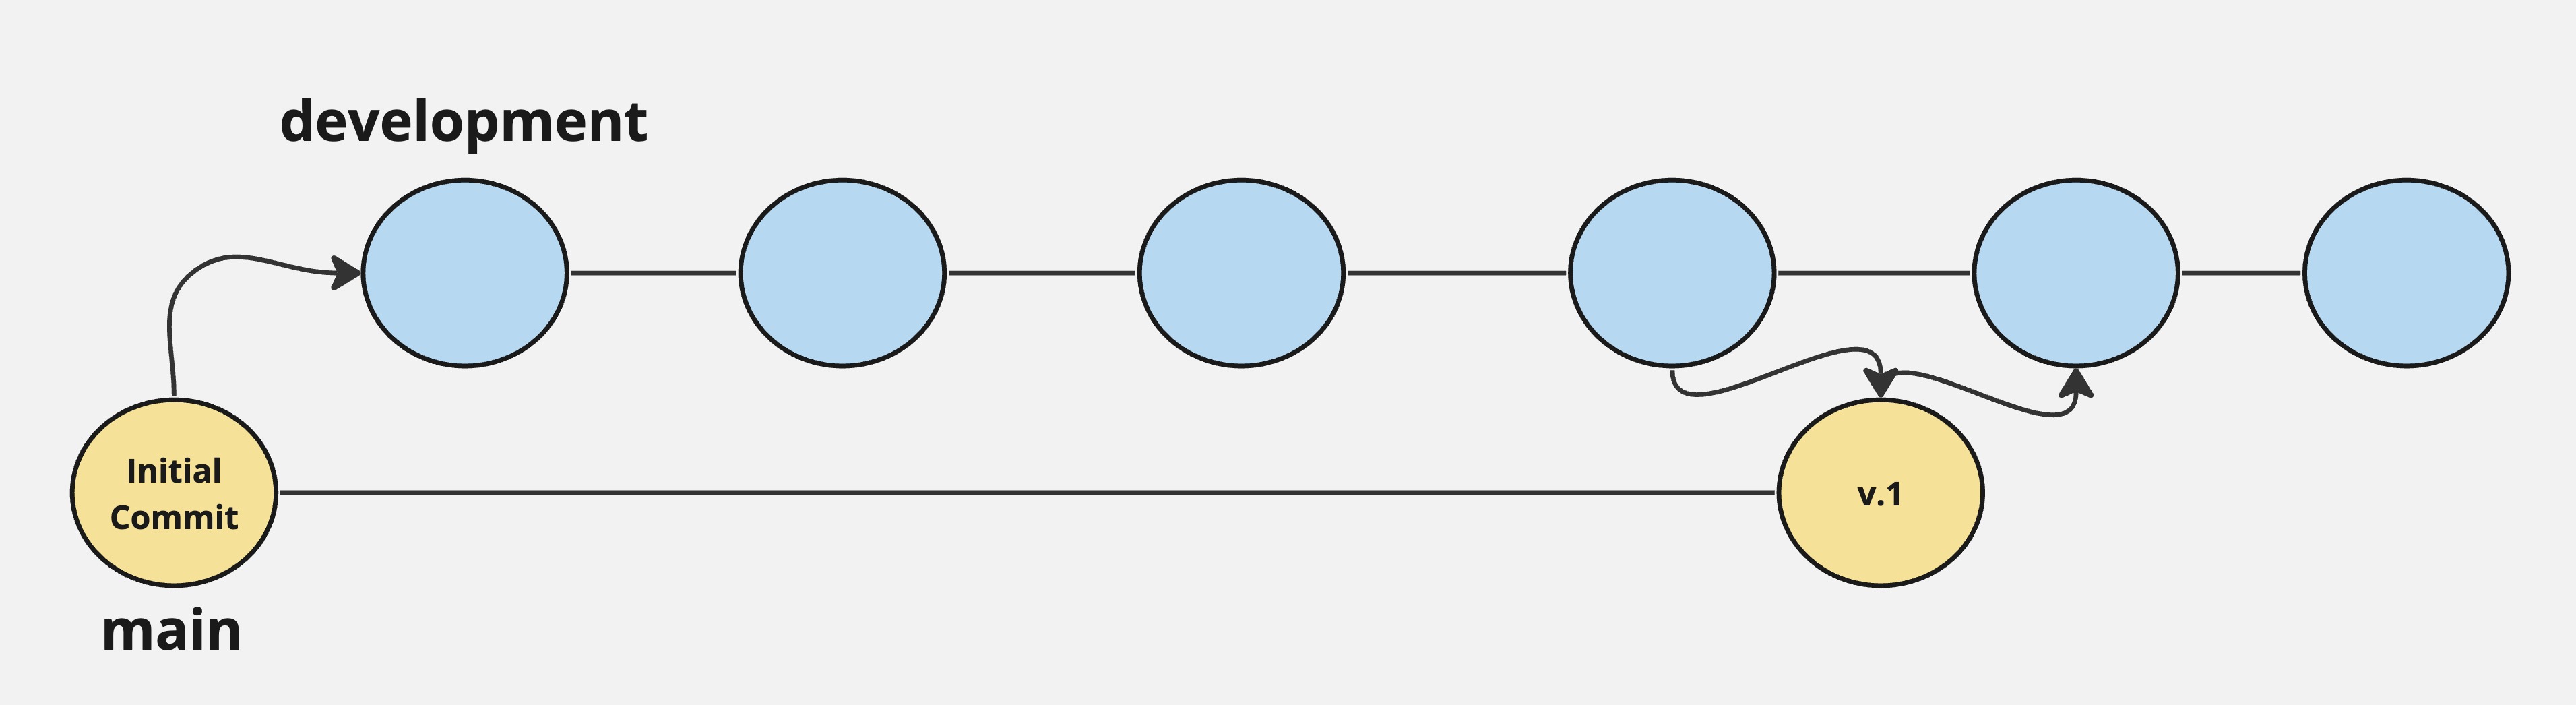
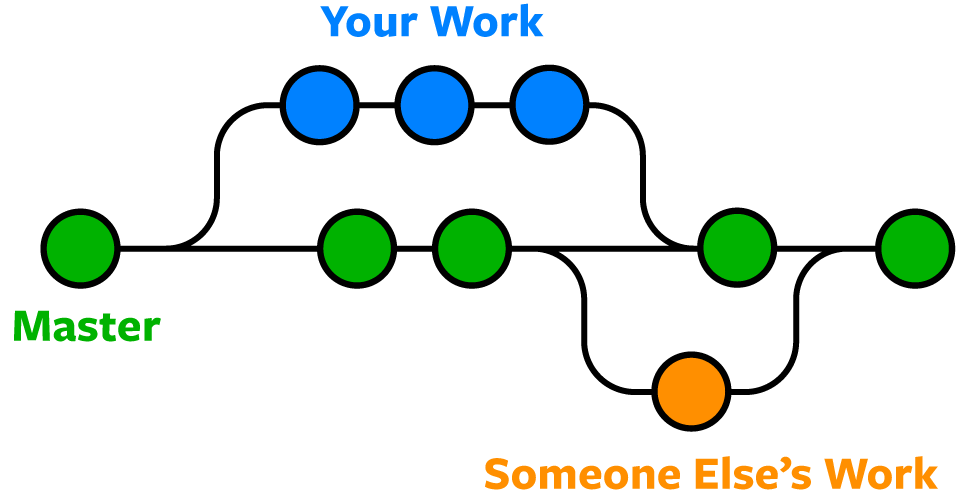
Git branches
Git branches are a way to create separate development paths without overriding or creating copies of your project.
Branches can be added, deleted, and merged, just like regular commits.

Git branches
Branches can be used to:
- Create separate development paths without overriding progress
- Separate different end goals of your project
- Creates separate branches for each stage of development (release, development, fixes, master)
- Creates separate branches for project collaboration!

Git branches: Hands on!
Git branches: Hands on!
- Let’s do our initial commit, create a new branch
dev, and switch to the new branch. - Then, let’s go back to the
mainbranch, create a new onebugs, and list them
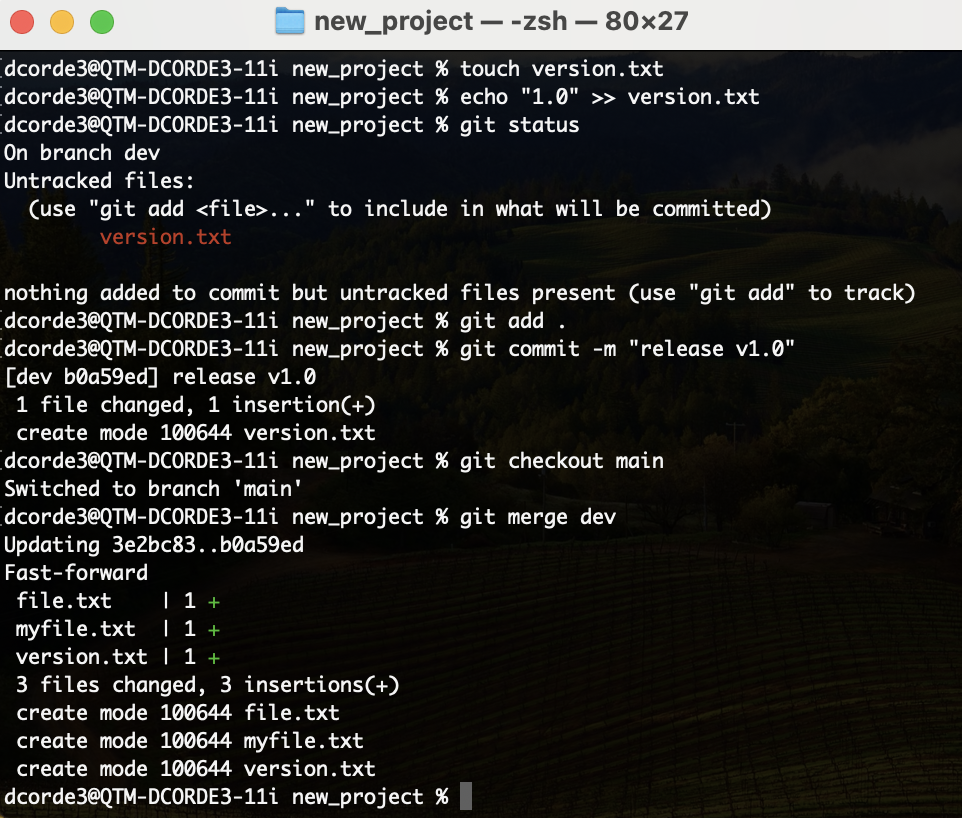
Git branches: Hands on!
- Let’s work on our
devbranch. - Add a
version.txtfile - Then, let’s merge our branches.
- To move on in our workflow, we can move back to the
devbranch and do a new commit and keep working in thedevbranch.
git checkout dev
echo "new text" >> file.txt
git add .
git commit -m "new file.txt content"
echo "new text" >> myfile.txt
git add .
git commit -m "new myfile.txt content"
git log
touch version.txt
echo "1.0" >> version.txt
git status
git add .
git commit -m "release v1.0"
git checkout main
git merge dev
git log
git checkout dev
git add .
git commit -m "starting new version"
git log
Check this material for more on Merge & Branches.
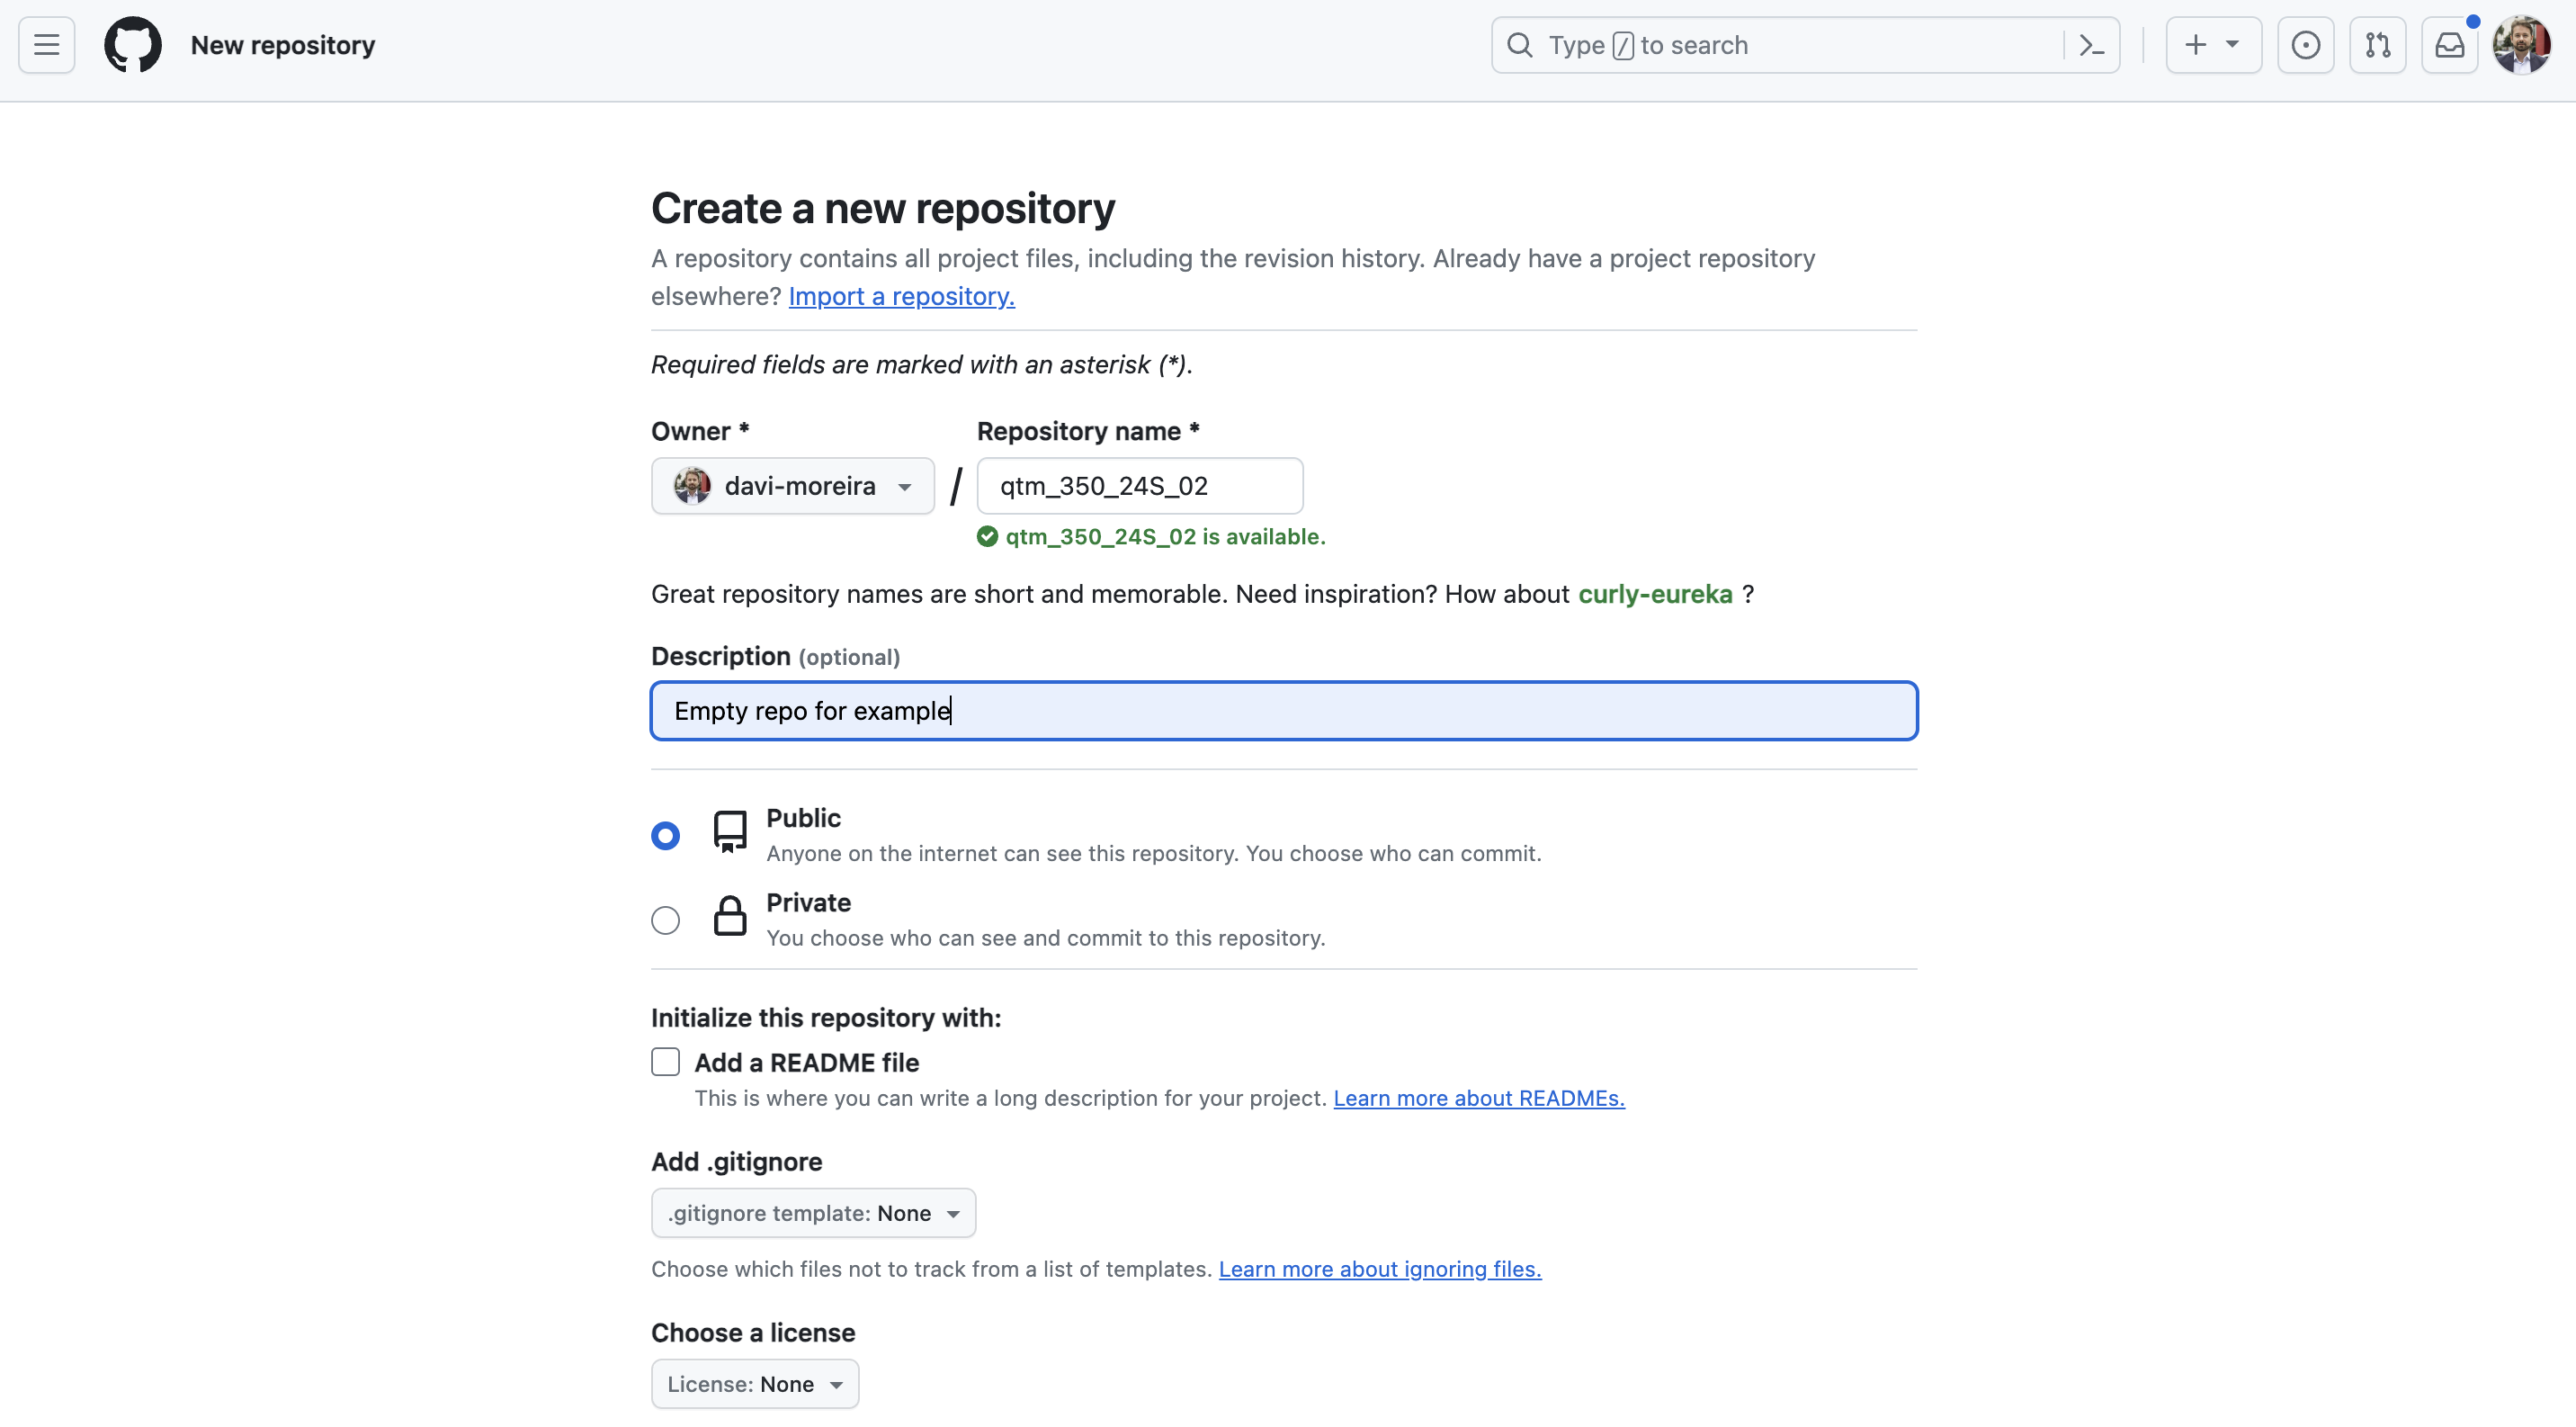
GitHub: Creating a New Repository
- First, we create a new repo on GitHub
GitHub: Creating a New Repository
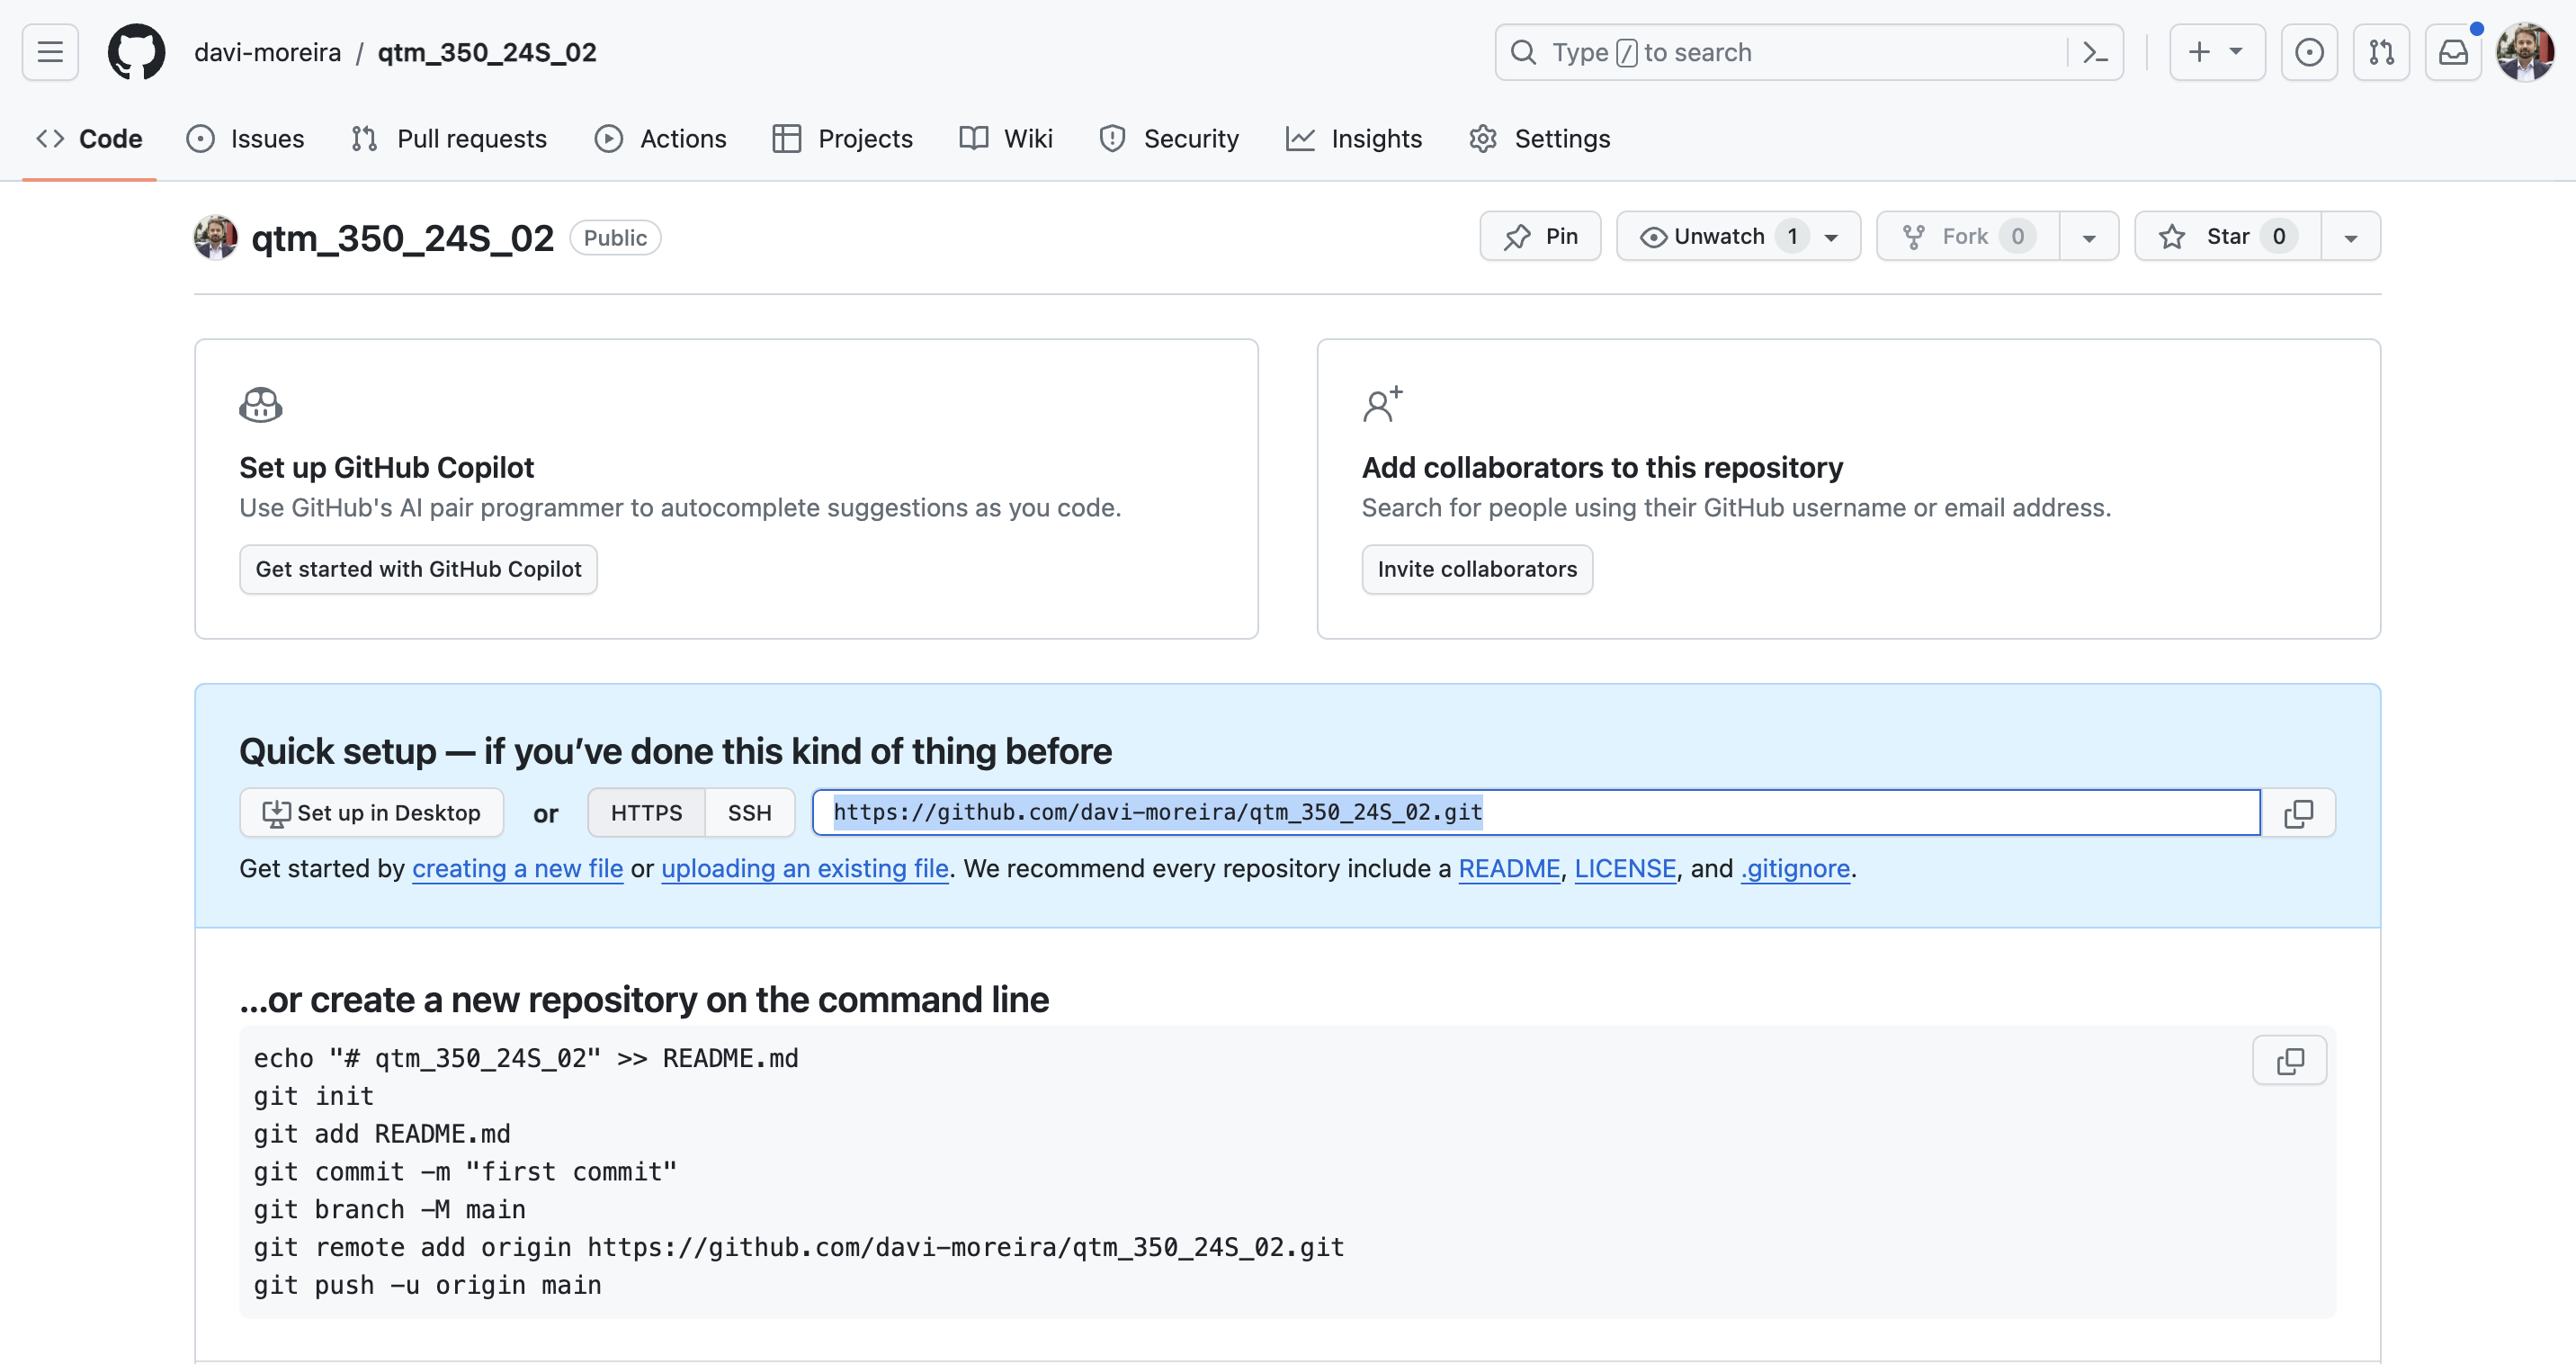
- We copy the remote
repoaddress.
GitHub: Creating a New Repository
The Push and Pull System
The Git/GitHub push and pull system is central to collaborating on coding projects. It allows multiple developers to work on the same project without conflicts.
The Push Operation: Sends your local commits to the remote repository.
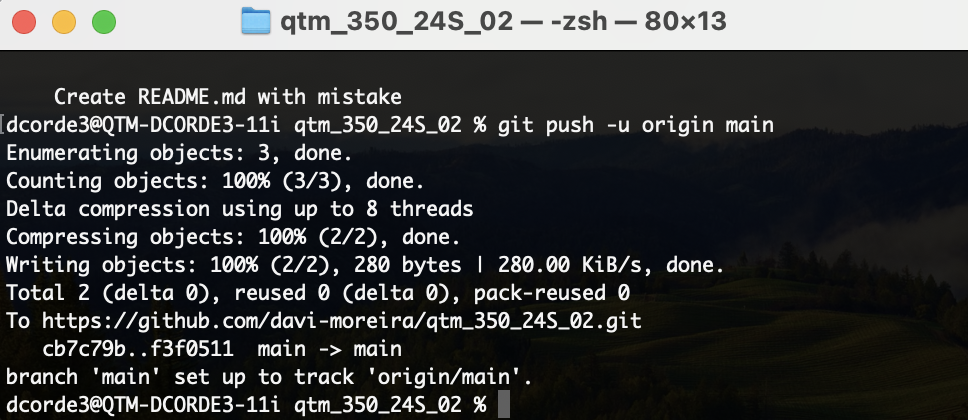
git push origin main- pushes commits from your localmainbranch to the remotemainbranch.
The Pull Operation: Fetches the latest changes from the remote repository and merges them into your local repository.
git pull origin main- pulls changes from the remotemainbranch and merges them into your localmainbranch.
Best Practices:
- Pull often to keep your local repository up-to-date.
- Push regularly to share your contributions with the team.

The Push and Pull System
- Starting with the Pull request
- Let’s create a
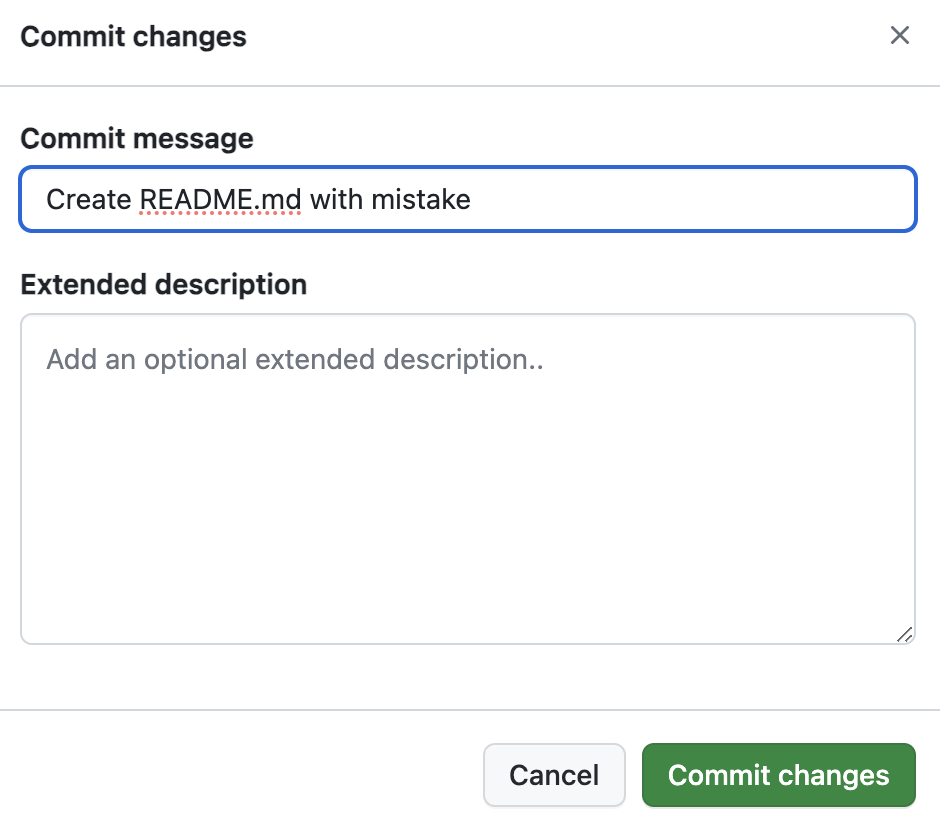
README.mdfile in the remoterepoandcommit:
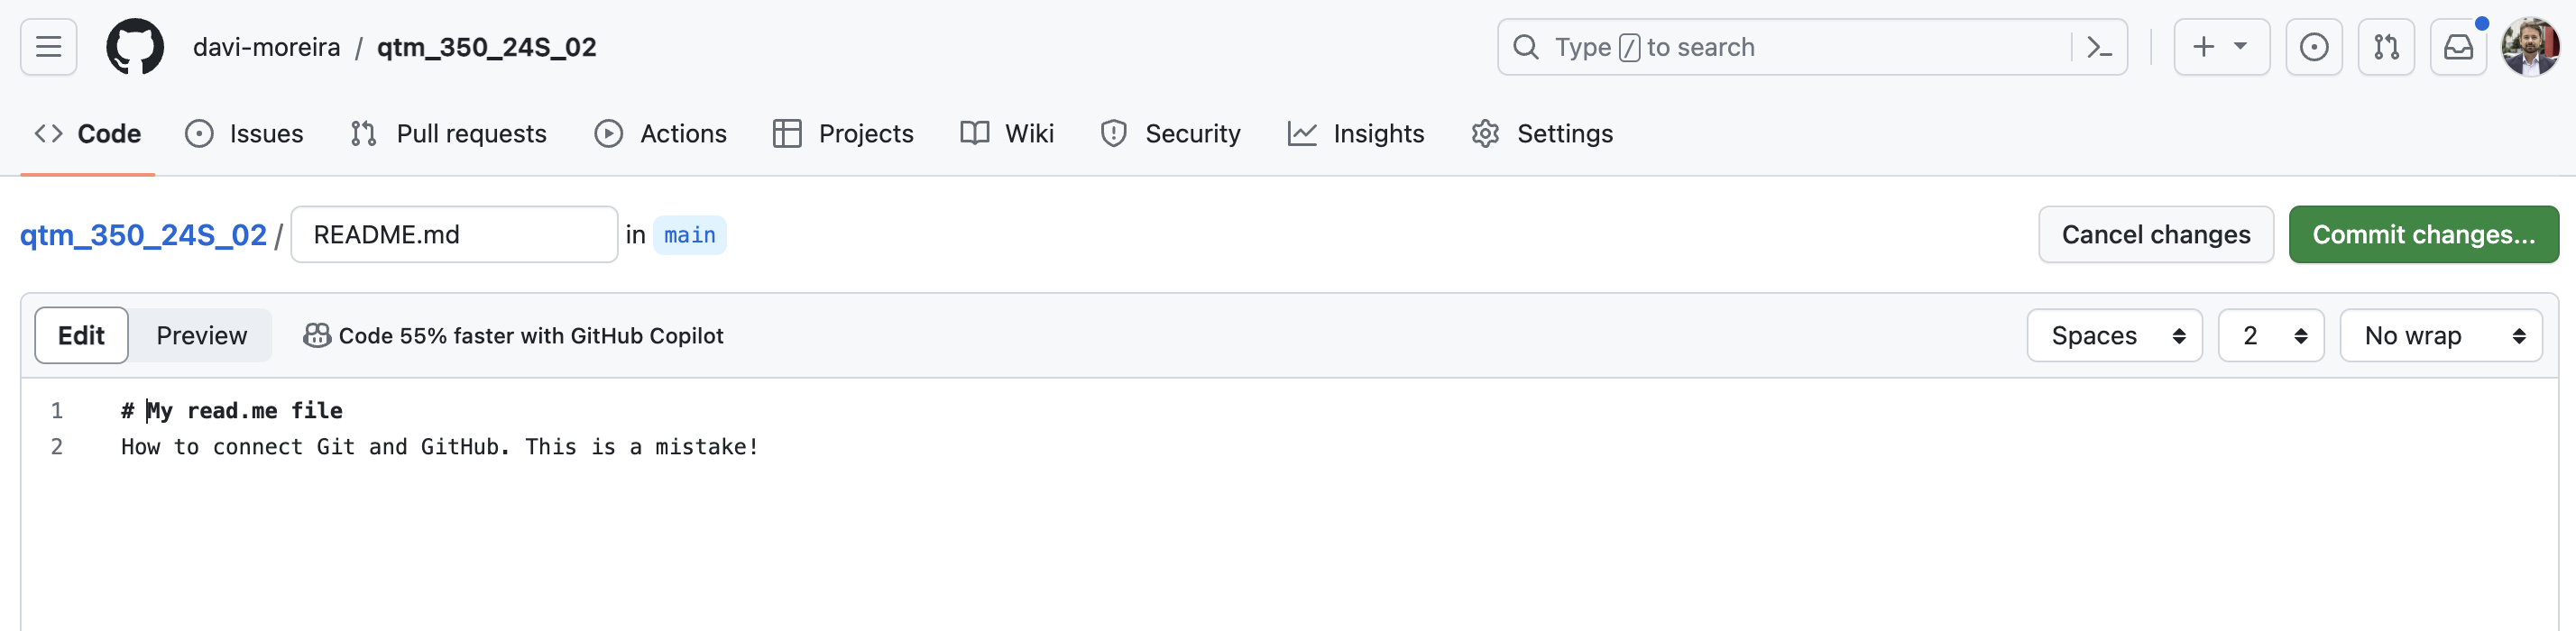
The Push and Pull System
- Let’s create a
README.mdfile in the remoterepoandcommit:
The Push and Pull System
- Let’s create a
LICENSEand.gitignorefiles in the remoterepoandcommit:
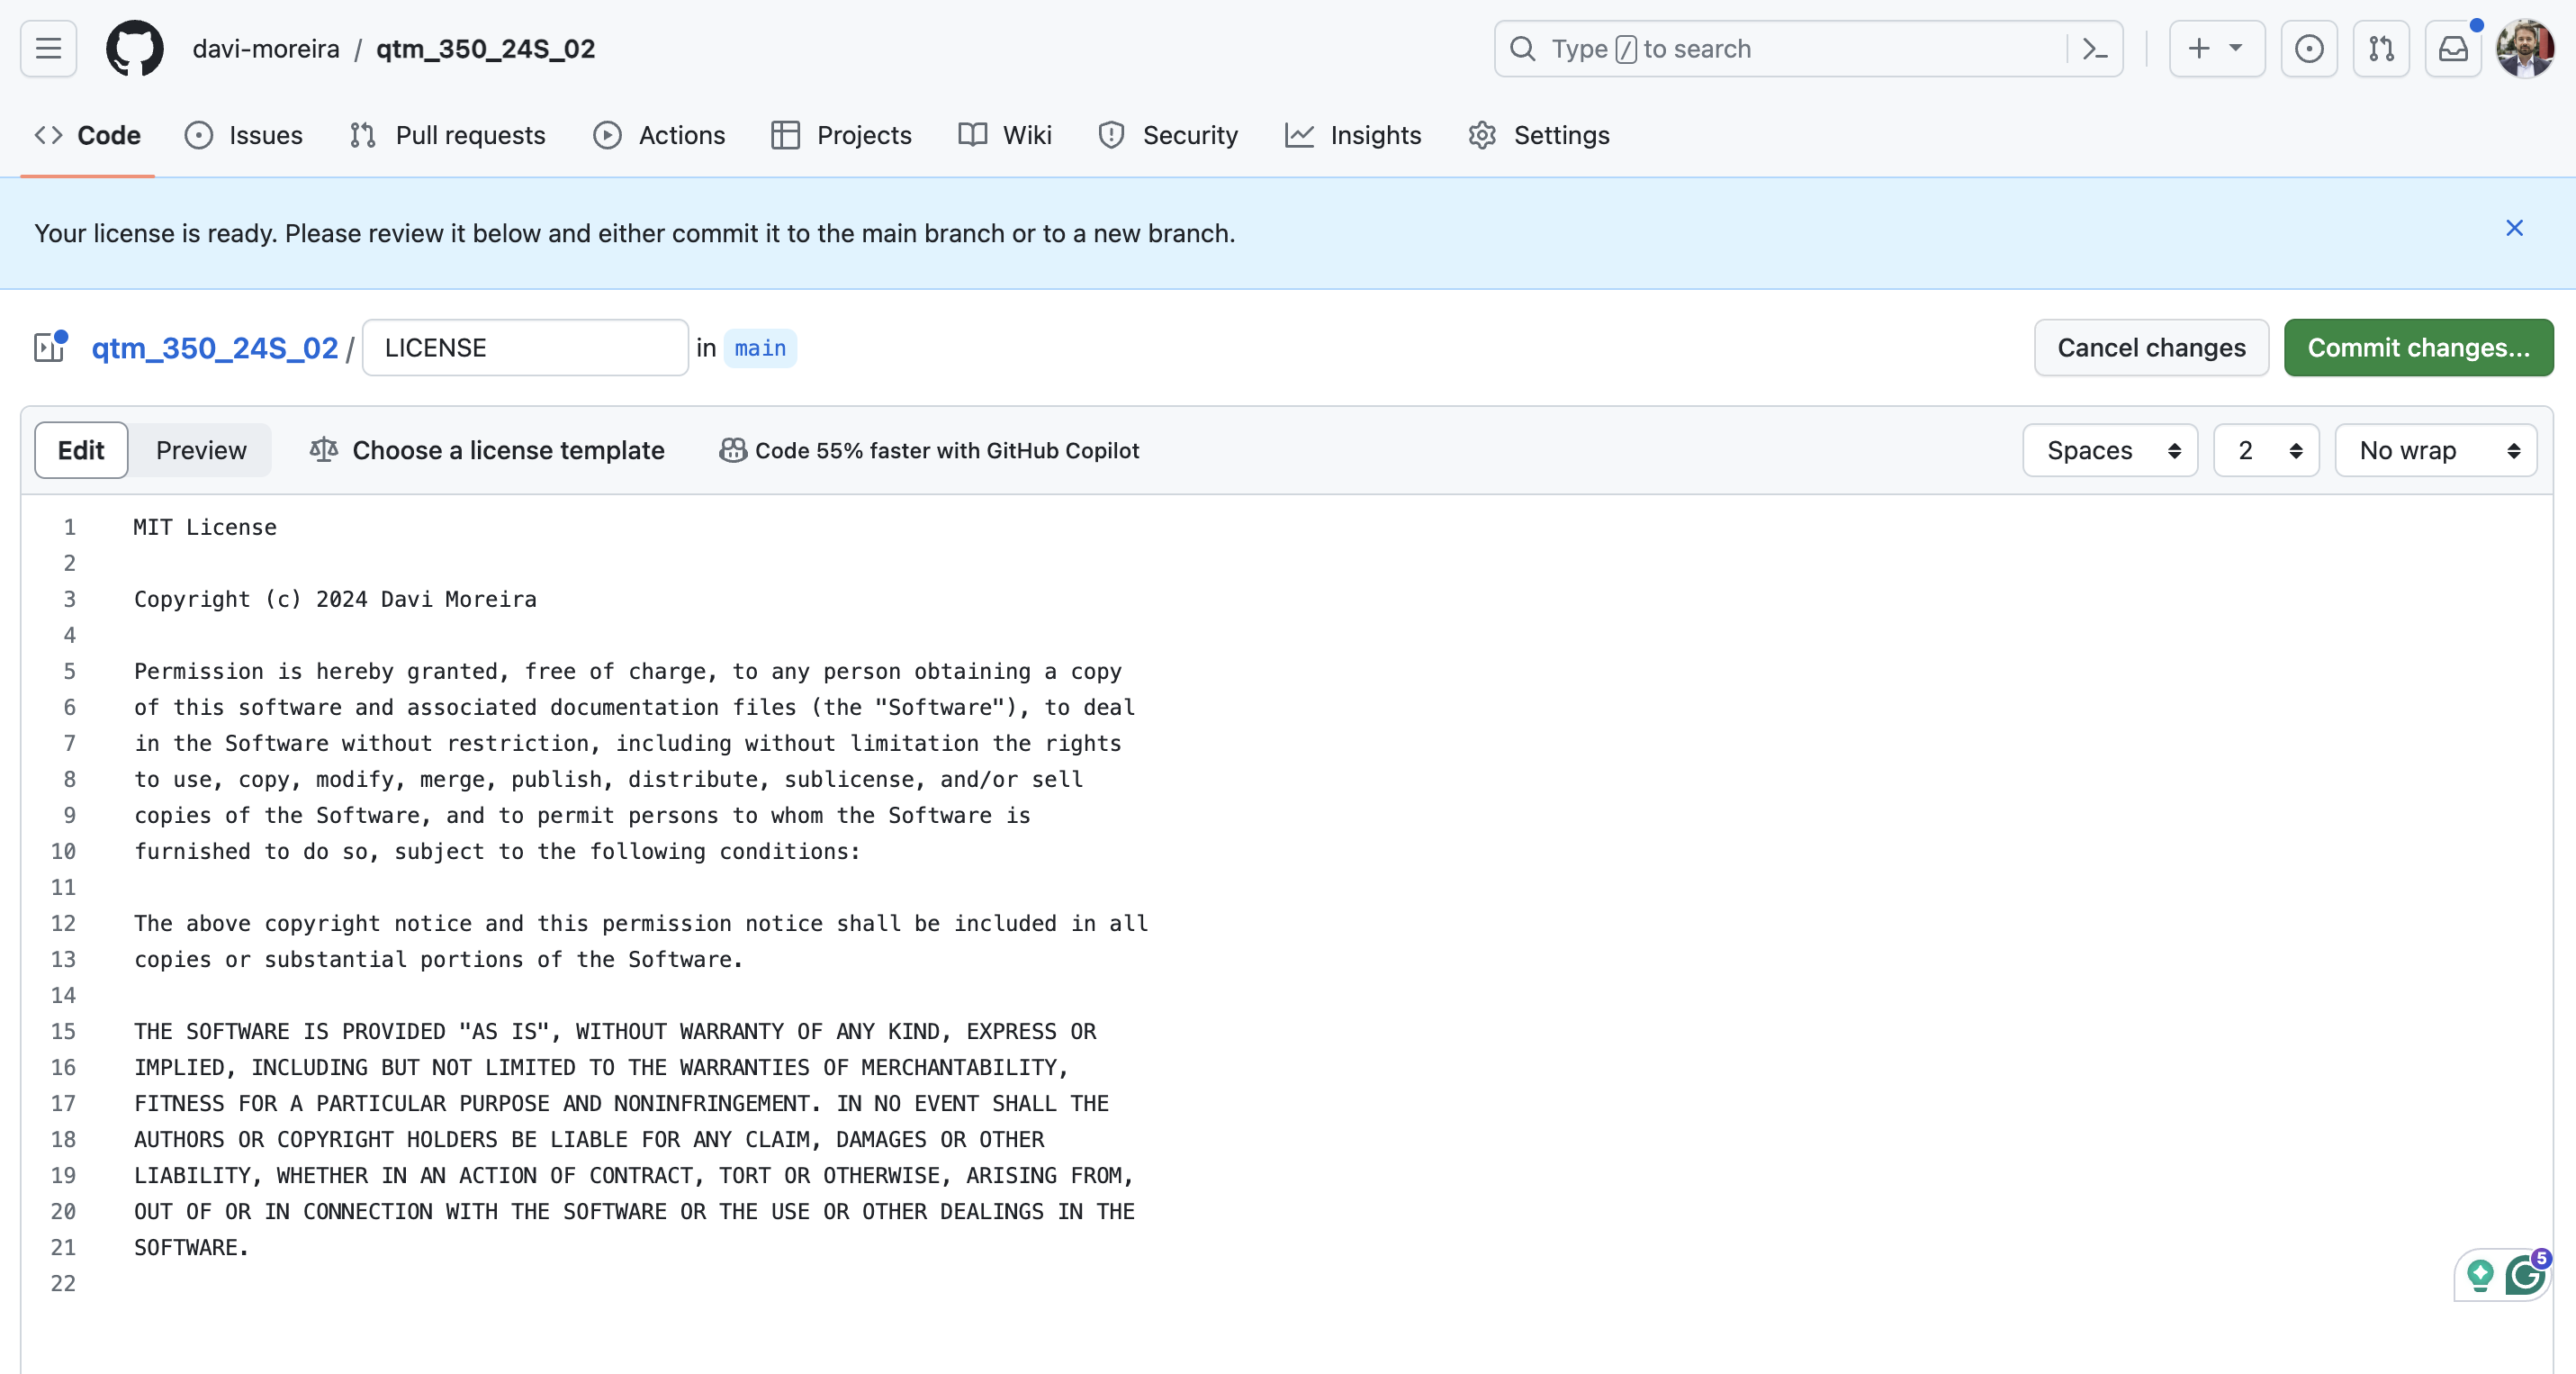
The Push and Pull System
The Push and Pull System
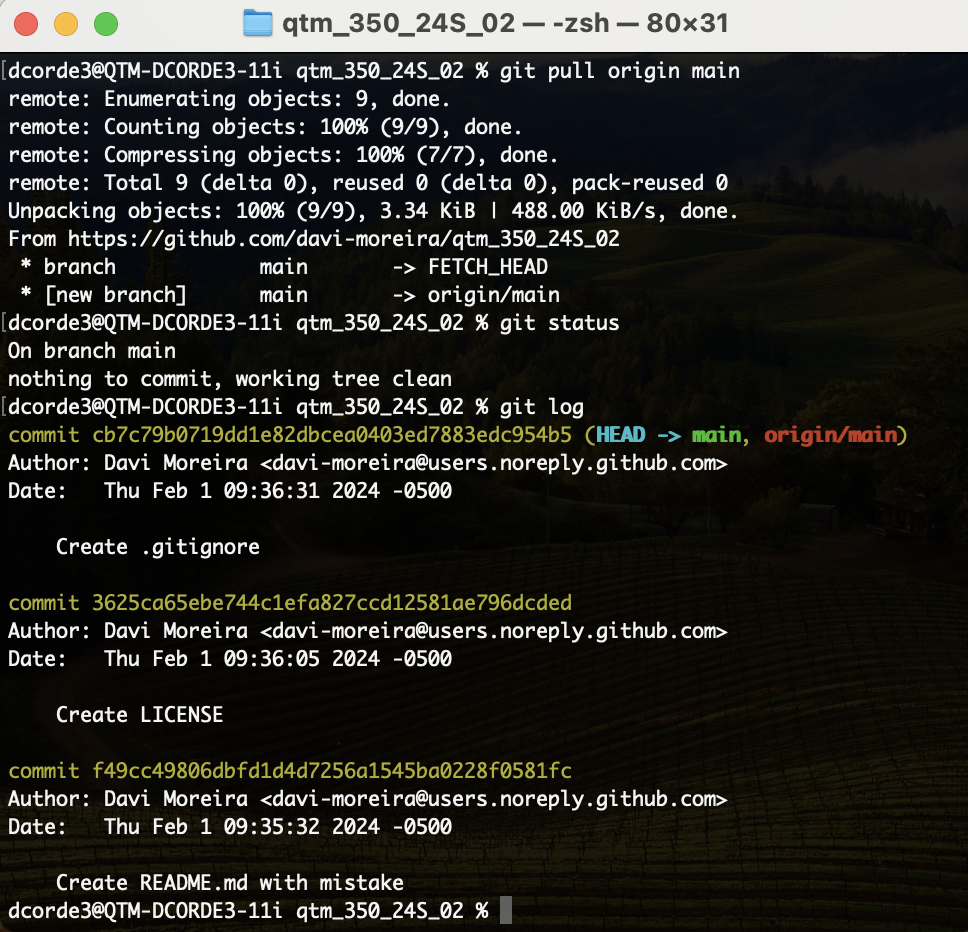
- Now let’s see the Push request.
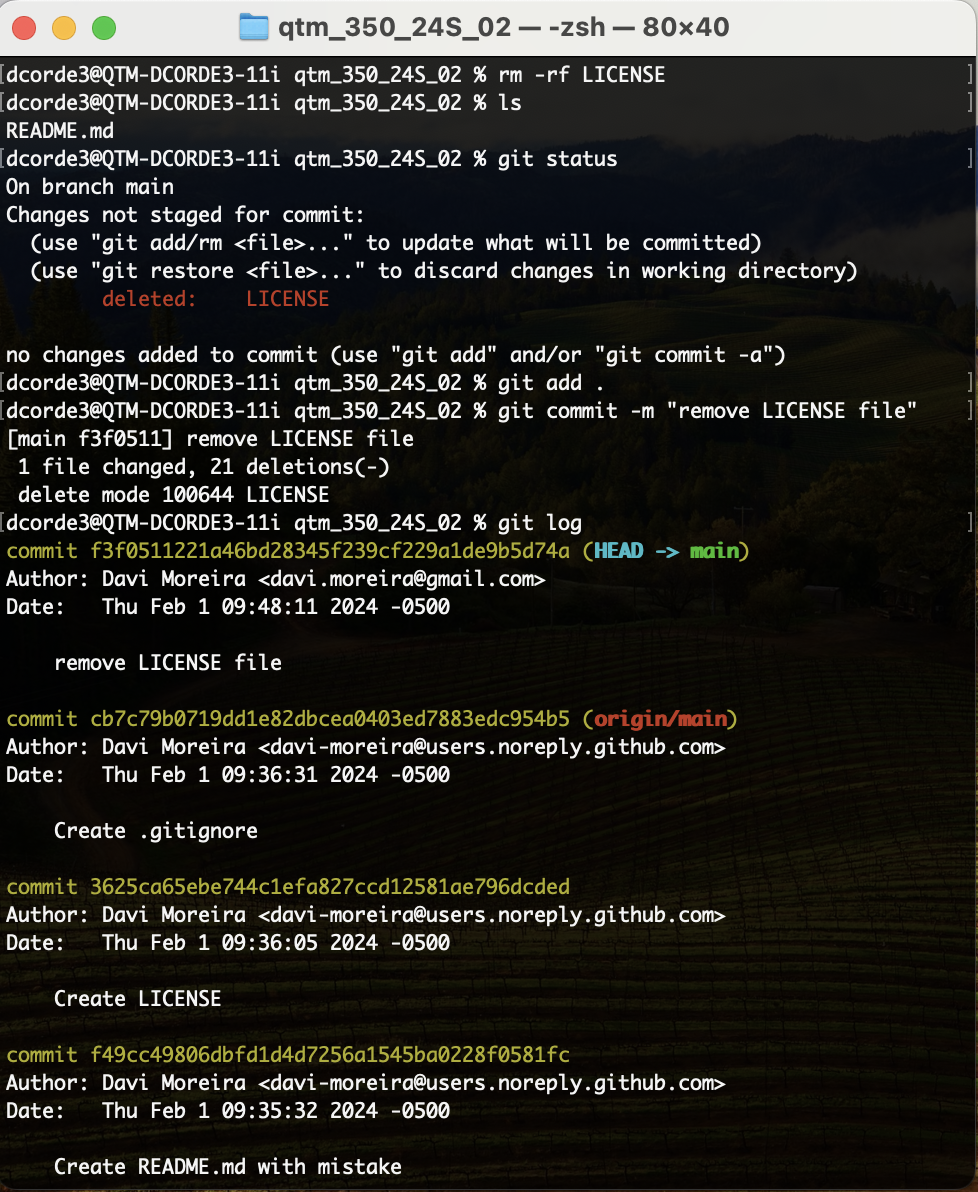
- Let’s delete the
LICENSE.mdfile locally and commit. - Now we can make a
Pushrequest. Conditioned on your settings, it will requires your user name and password. - Let’s check the remote
repoon GitHub.
The Push and Pull System
- Now let’s create a branch to correct the mistake in the
README.mdfile.
git pull
git checkout -b err01
# open the file and edit
git status
git add .
git commit -m "fixed mistake in readme file"
git checkout main
git merge err01
git log
git push
# let's check the remote repo
git push origin err01
# let's check the remote repo and check the commits
# git push origin --delete err01 # to delete the branch in the remote repo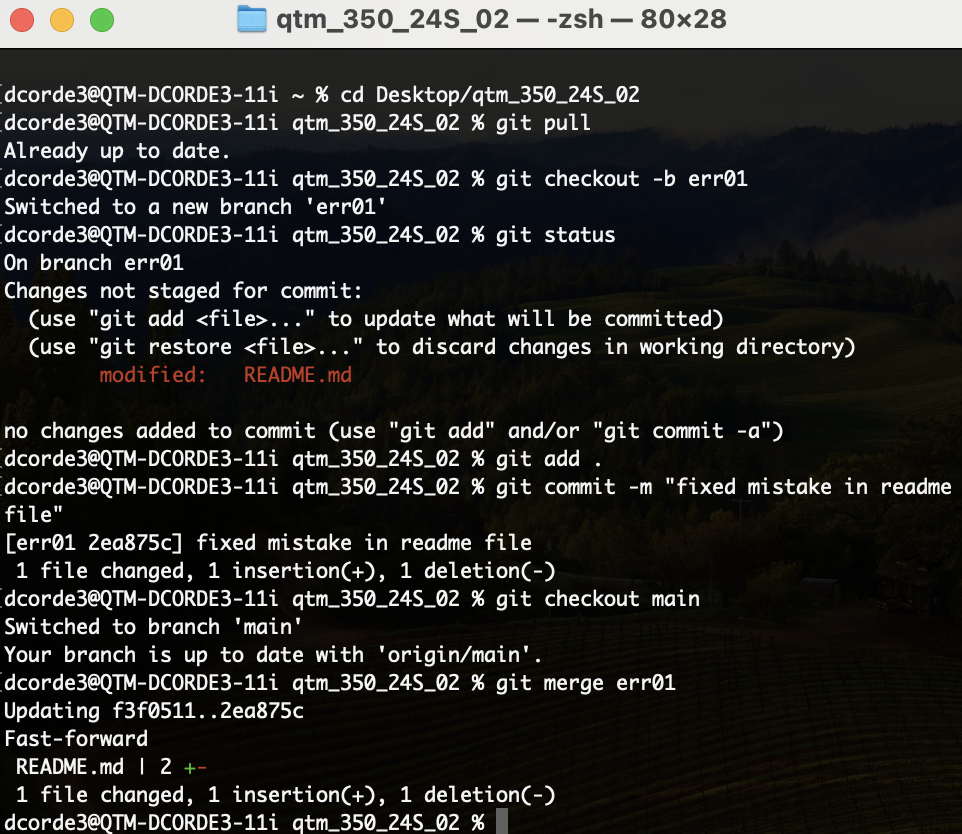
RStudio + GitHub + Git
Collaborating Workflows
- There is no one size fits all Git workflow.
- It is important to develop a Git workflow that is a productivity enhancement for the team.
- A workflow should also complement business culture.
Centralized Workflow
Uses a central repository to serve as the single point-of-entry for all changes to the project. The default development branch it the
mainbranch and all changes are committed into this branch. This workflow doesn’t require any other branches besides main.Also check:

Feature Branch Workflow
All feature development should take place in a dedicated branch instead of the
mainbranch. This encapsulation makes it easy for multiple developers to work on a particular feature without disturbing the main codebase. It also means the main branch will never contain broken code, which is a huge advantage for continuous integration environments.Also check:
Forking Workflow
Instead of using a single server-side repository to act as the “central” codebase, it gives every developer a server-side repository. This means that each contributor has not one, but two Git repositories: a private local one and a public server-side one.
Also check:
